WordPress tutorial for total beginners!
I designed this tutorial to be approachable to beginners who only have a bit of HTML and CSS experience. JavaScript experience will certainly help, but is not required! In this tutorial I will walk through everything from downloading WordPress and setting up a dev environment, all the way through writing our first PHP functions and explaining the WordPress theme hierarchy and how custom-built WordPress templates are created! It will be enough for you to begin building custom WordPress themes on your own. Lets dive in!
What exactly is WordPress?
WordPress is a popular and user-friendly content management system (CMS) that allows you to create and manage websites. WordPress is written in PHP, and allows us to write our own PHP code to dynamically generate content. It provides a platform for building websites and blogs with a wide range of customizable themes, plugins, and features.
Dev Environment Set-Up
In web development, the term "environment" refers to the setup or configuration in which you work on your web projects. It includes the combination of software, tools, and settings that enable you to develop, test, and deploy websites or applications. This typically involves an operating system, a web server, a database server, and development tools such as code editors, debuggers, and version control systems.
First, lets learn the difference between a local environment and a production envrionment:
A local envrionment is an environment that we run on our local machine that allows us to build and test our projects.
On the other hand, a production envrionment is where our project is hosted online and would be considered 'live'. Once our site is online and can be seen by anyone, it is considered 'in production'.
Dev Environment
- Separate copy of your site.
- Only the developers and owners can see it.
- The 'work in progress' site.
- Private, safe sandbox to experiment in.
Production Environment
- The real, live website.
- Hosted online.
- Everyone can see it.
WordPress requires a specific environment in order to run. We will need the following...
- PHP
- Apache (NGINX)
- MySQL (MariaDB)
Don't worry if you're unfamiliar with these. In the next step, I'll guide you through the installation of all three components effortlessly and free of charge.
I typically use either Local by Flywheel and/or XAMPP when coding. In this tutorial, I will show you how to use Local by Flywheel as it is much easier to start with and comes with everything we need right out of the box.
To begin, navigate to the Local homepage, where we can download Local by Flywheel. (Don't worry, it is completley free!) Go ahead and download the version for your pc, run the installer and follow the instructions. They are super straightforward and require no changes. Once you have it downloaded, go ahead and open Local by Flywheel and proceed to the next step!
Using Flywheel...
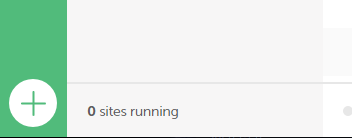
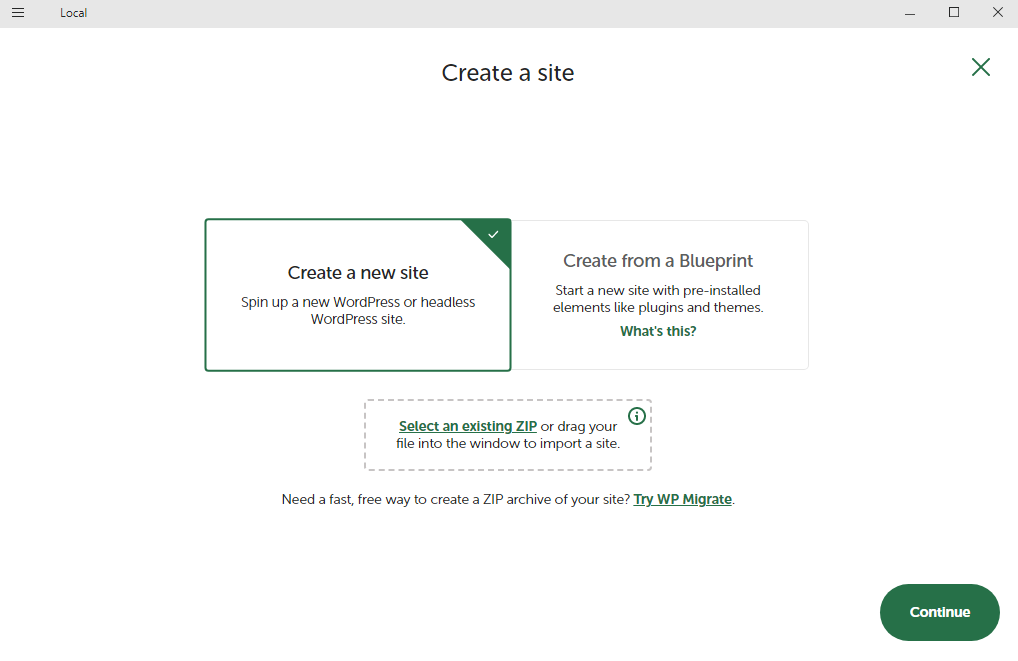
- To create a new site, click the button with the "+" symbol at the bottom of the flywheel app. Then click on 'Create a New Site', not the blueprint option.
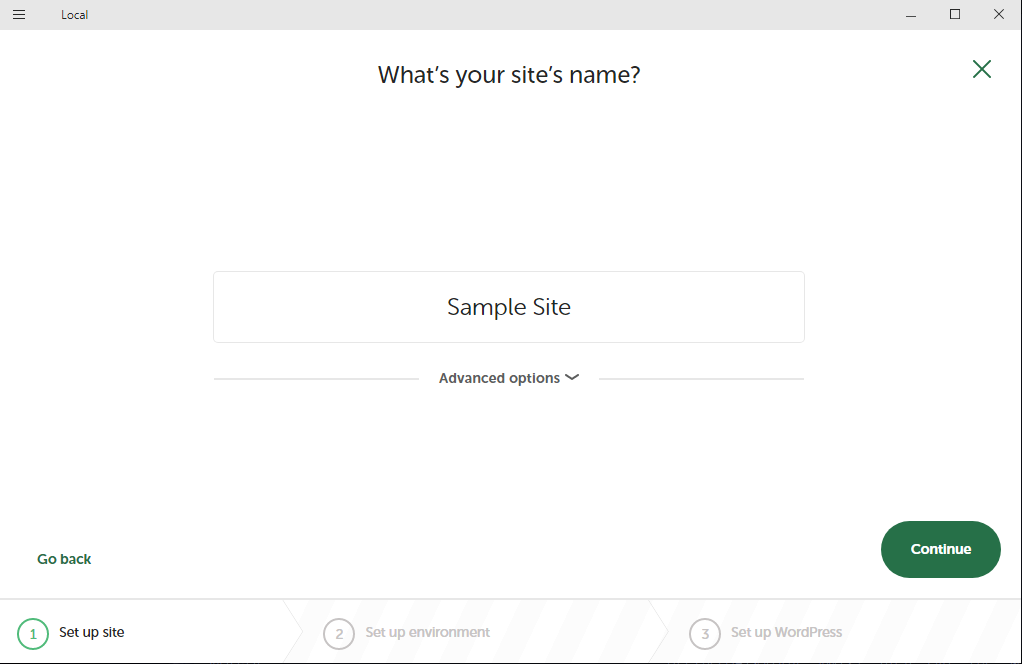
- We will first be prompted to enter a name for our site, this can be any name that you want. Then hit 'continue'.
- To make it easier on ourselves, we can use the 'preferred' options instead of 'custom'.
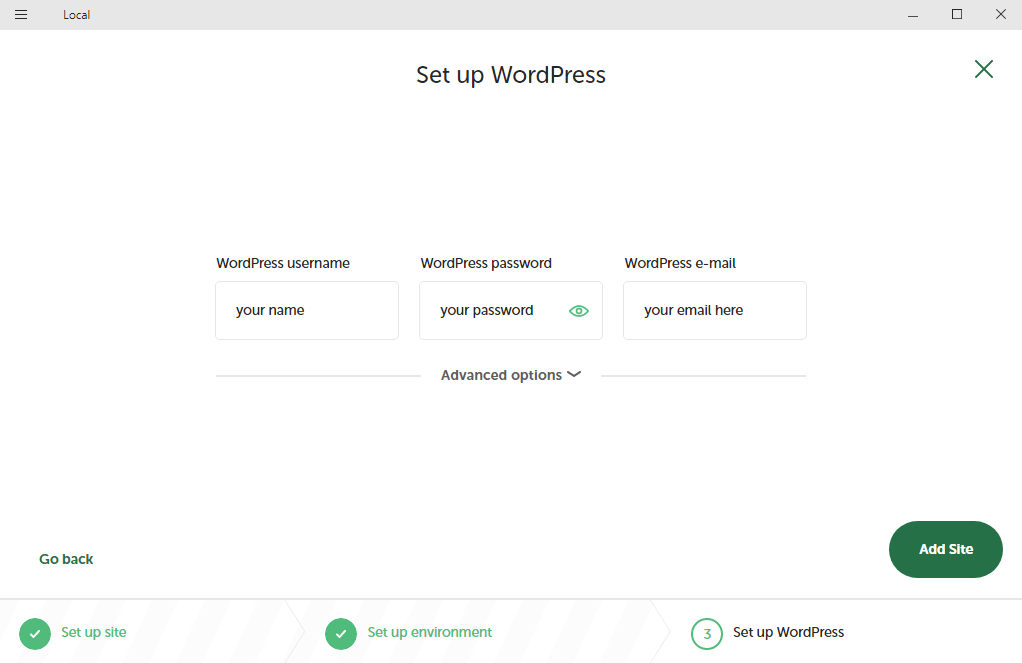
- Next, we will set up our username, passsword, and email for this particular project. Enter your usual email into the 'email' input.
- Then, click 'add site'. It'll take a moment while it provisions. You may get a pop up from Command Proccessor. Go ahead and allow this, it is requesting access to use your localHost environment.
- We can then click the 'start site' button in the top right corner and the 'open site' button to launch our website in the browser once out site is running. The site may start automatically. If not, click 'Start Site' in the top corner. The same goes for veiwing the wp-admin site: simply click the 'WP Admin' button to view the admin page. Typically you'll have both of these open. You will see some styling that is added by WordPress as a placeholder, this is normal.
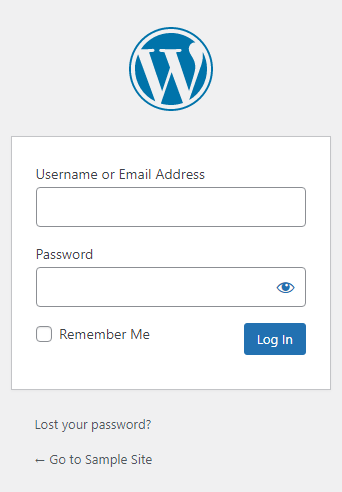
- Upon navigating to the wp-admin site, we will be prompted to login using the username or email and password we set up previously when creating the site.


If we have finished working on our site for the day, we can navigate back to the Local by Flywheel application, and hit 'stop site' in the top right corner. We are then free to close the program and all of our browser windows.
If it is a new day and we want to work on our site again, simply open the Local by Fywheel application, and hit 'start site'. This will start up our site where we can then open it in the browser, as well as the admin site, too.
To locate the files...
We can right-click on the website of our choosing within Local, and select 'Reveal in Finder' on Mac, or 'Go to Site Folder' on Windows. These files typically store within the User folder, inside another folder called 'Local Sites'.
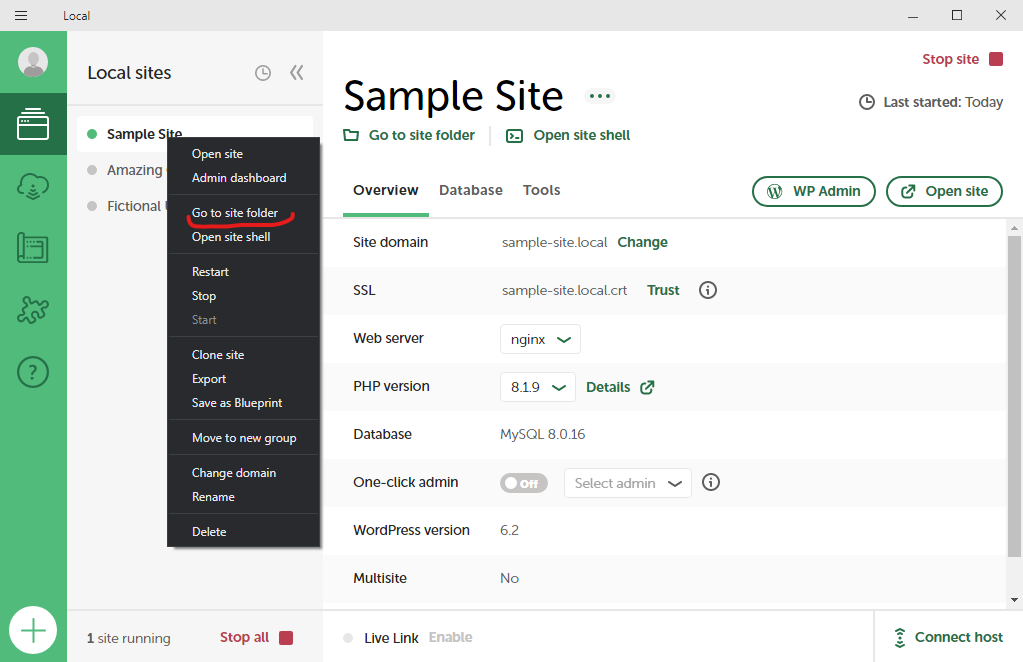
An example of the path to your files: C:\Users\your-name\Local Sites\your-theme\app\public
Starting out with basic PHP...
First, if you haven't got one already, you will need a dedicated text editor in order to create and work with PHP files. Personally, I recommend VS Code. It's completley free to download and use!
VS Code is easy to download and install, and requires very little to no set-up to begin writing code. Since we are using Local by Flywheel, we already have PHP installed and can begin writing PHP code.
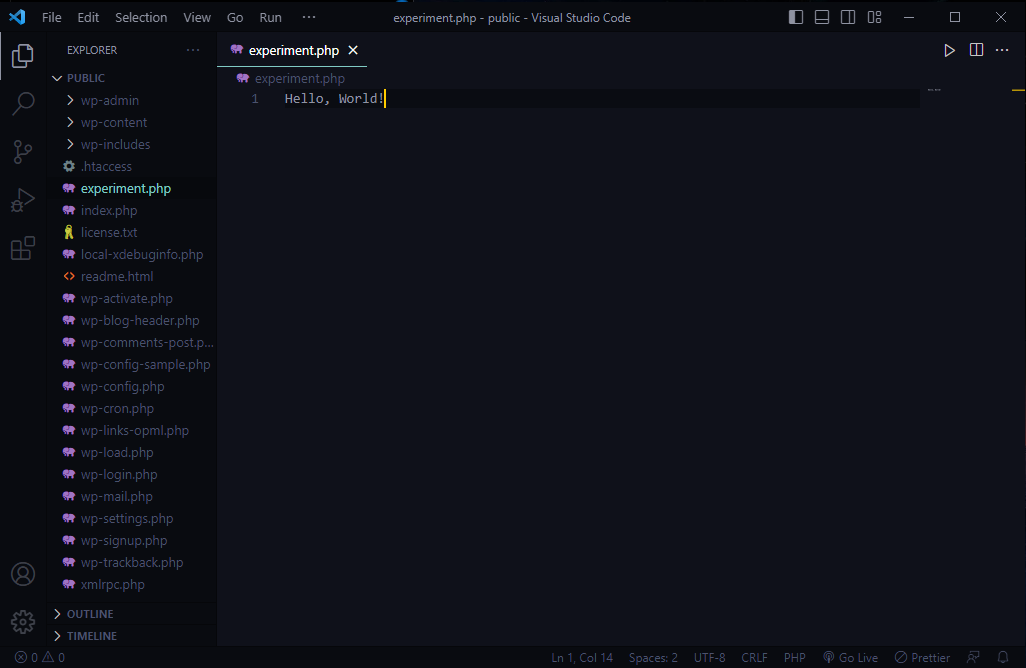
To begin experimenting with PHP, we would navigate to the PUBLIC folder within our project, where we would then create a new php file called 'experiment.php'. This can be done easily using any text editor by opening the folder with the editor, and then hitting 'File' and 'New File'. Note: it is not good practice to have a random file added in with our other WordPress system files, however, this is purely for educational and practice purposes only! Let's go ahead and place some filler text in our file for now. I will add the phrase 'Hello, World!' to mine.
In order to view this file in the browser, first open up the new project in the browser either by hitting the 'open site' button, or simply navigating to the url. Then we would add '/experiment.php' to the end of the url.
An example: http://your-wordpress-project.local/experiment.php
Once we begin writing into our 'experiment.php' file, making sure to save when we are done, we can simply refresh the browser and view our new changes! You can see how this can be used to practice writing PHP.

Note: this is NOT how we add new pages to a WordPress website, this is just for educational and testing purposes. This is simply a great way to write and practice our PHP.
Lets take a look at some PHP code...
Warning: this is bad code, don't emulate this it's just a quick example.
<?php
  echo 2 + 2;
  $userName = 'Ryan';
?>

<h1>Hello, <?php echo $userName; ?>!</h1>
<?php echo 5 * 5; ?>
<p>This page is all about <?php echo $userName; ?>.</p>
In the code above, we enter the world of PHP by using the <?php opening tag. First, we perform a simple calculation of 2 + 2 using the echo keyword, which tells the server to display the result in the webpage. We also create a variable called $userName, following the rule of always using a $ when declaring PHP variables. Then we exit PHP mode, using the ?> closing tag.
Further down the code, we encounter some familiar HTML, specifically an <h1> element. Notice how we can seamlessly integrate PHP by using <?php echo $userName; ?> WITHIN the <h1> tags. This allows us to dynamically insert PHP values into our HTML code.
Pay attention to the use of the echo keyword within the PHP code. We must include echo to display the value in the browser. It 'echos out' what we have written. Forgetting to use echo will prevent the value from appearing in the browser.
Remember that a PHP block begins with <?php and ends with ?>, and we can write our PHP code within this block. Additionally, we can embed PHP code within almost any HTML element. This practice is common when working with WordPress, which you'll soon discover.
Now then, when all of this is rendered in the browser, we would see the following...
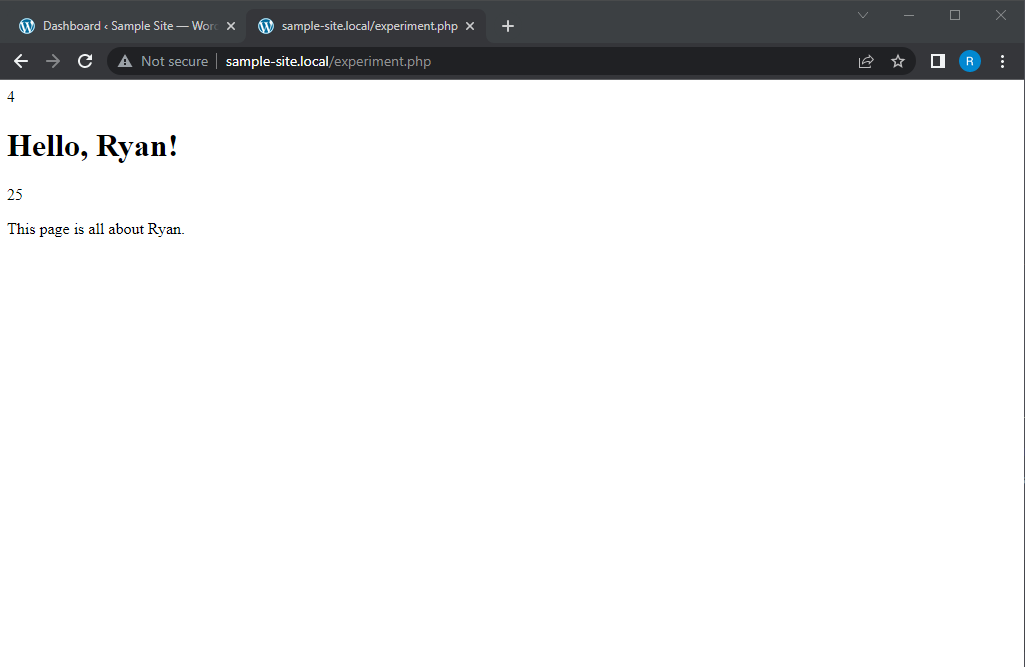
Not very impressive, but it is a fantastic starting point!
We notice that the server has calculated 2 + 2 and displayed the number 4 on the page. Followed by our <h1> element. Then the server calculates 5 × 5 and displays it below our h1 element. Finally ending with the paragraph element that is using PHP to programatically plug in the value from the $userName variable.
Let's clarify something: what we have written in our experiment.php file has nothing to do with WordPress itself. It serves as a way to familiarize ourself with the basic structure of PHP. We've learned about creating variables and how PHP can seamlessly integrate into HTML by using the <?php opening tag and ?> closing tag. We also see how to output information and values to the browser using the echo keyword. Don't worry if you're not yet a PHP expert; you'll gain more knowledge as you progress.
One more thing regarding the experiment.php file. If our intention is to host the website we're working on, it's advisable to delete the experiment.php file from our project. Typically, it's not a good practice to have random files mixed with the core files in the root of our WordPress project. Leaving it in won't cause any harm, but I strongly recommend deleting it once we're ready to host the site.
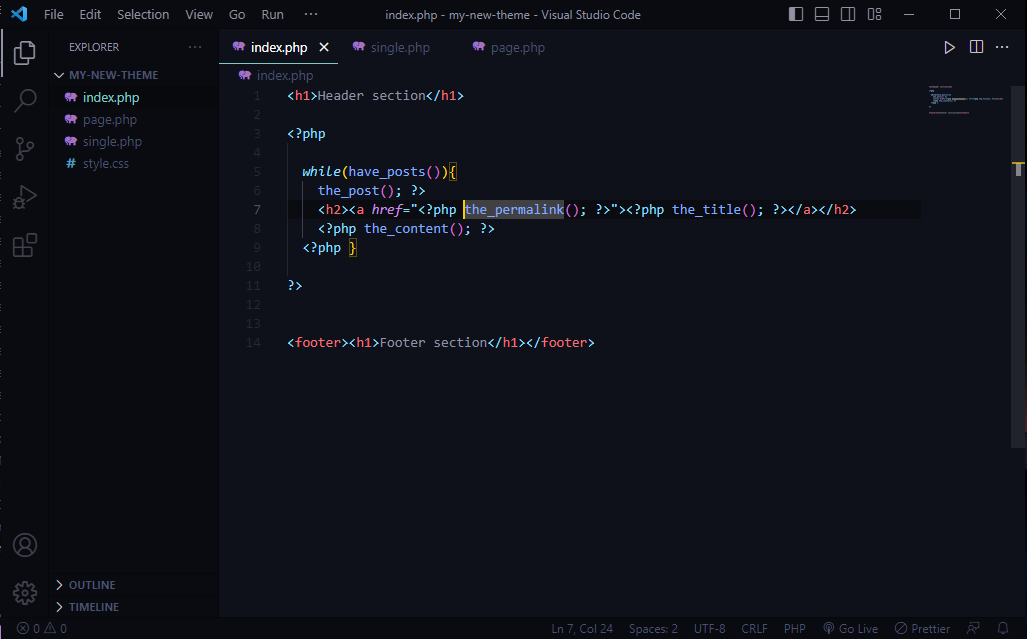
Creating our very first WordPress theme
Previously we began experimenting with looking at some very basic PHP and learned how to plug PHP into HTML tags. Now let us begin creating our very own theme.
First, lets take a look at our admin site. Again, you can get to this from the Local by Flywheel application by clicking the 'WP Admin' button, or simply adding '/wp-admin' to the end of our project's url.
An example of the url method: http:/your-wordpress-project.local/wp-admin
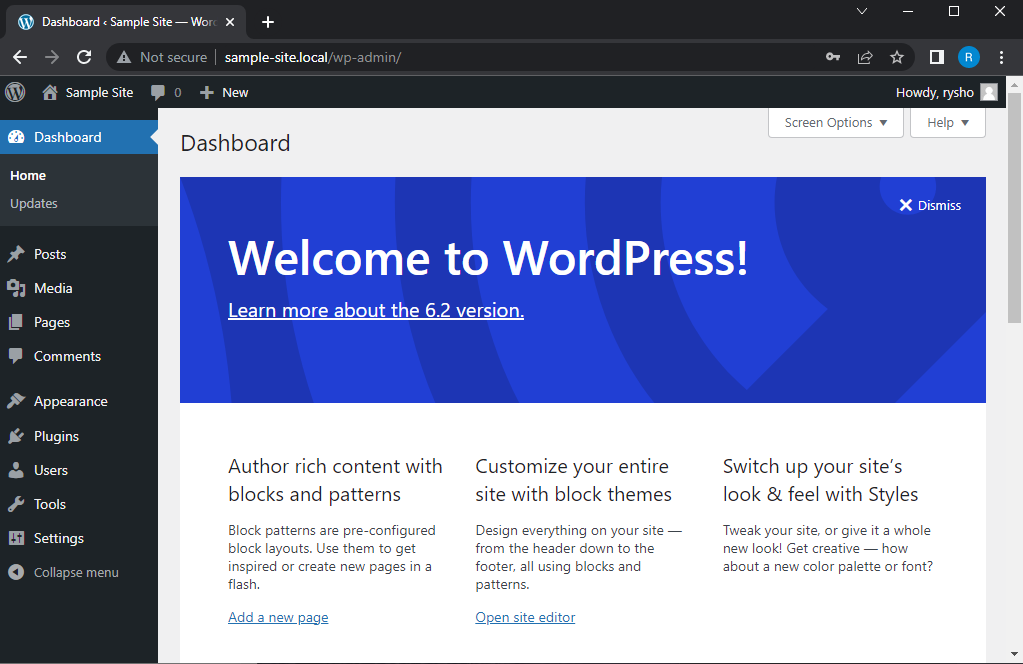
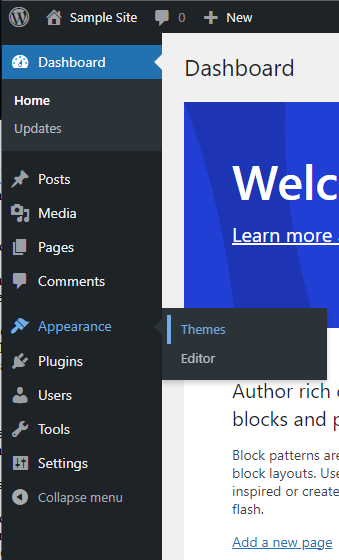
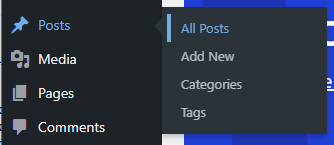
Now, typically as a WordPress developer one of the initial steps is to select a "Theme" to work with. A Theme is essentially a pre-designed template created by someone else that we can customize according to our requirements. To access the Themes section, we need to go to the "Appearance" tab in the admin site. You can find it on the left-hand side of the site in the sidebar. From there, click on "Themes". Here, we have the option to either choose from existing themes or download a new theme of our choice by clicking on "Add New". The selection is vast, with thousands of themes available to explore and choose from.
Another way to add a theme to your project is by using the 'Upload Theme' button, which can be found near the top of the 'Themes' page. This option is useful when you have purchased or downloaded a theme from another source like Themeforest and want to incorporate it into your project for customization.
To upload a theme, simply click on the 'Upload Theme' button. This will prompt you to select the theme file from your local computer. Once you've chosen the theme file, click 'Install Now' to begin the uploading process. WordPress will handle the installation and make the theme available for activation. Using the 'Upload Theme' option gives you the flexibility to work with themes that are not available in the WordPress theme repository. It allows you to explore a wider range of design options and find a theme that suits your specific needs.
That isn't the focus of this tutorial, however. Instead, we will focus on how to get started creating our own themes from scratch. 😎
If we are on our 'Themes' page in our admin page, and we want to add our own theme into the mix, all we need to do is create a new folder in a very specific location.
The easiest way to find what we are looking for is to.....
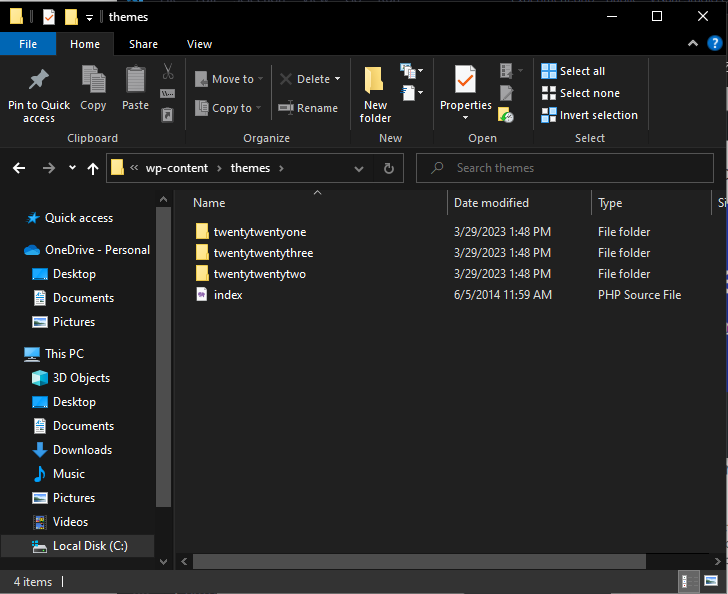
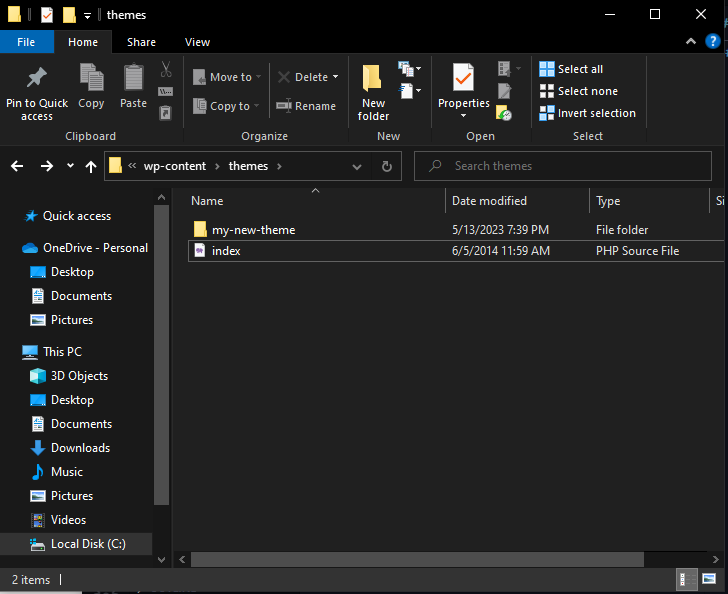
- Navigate back to Local by Flywheel, right-click on the project we're working on, and view the files with your file explorer, same as before.
- Enter the project folder you are working out of then enter the 'app' folder, then the 'public' folder, and then finally the 'wp-content' folder. From there you'll see the folder called 'themes'. That's where you want to be. An example of the path on Windows:
- Inside the 'themes' folder you'll see other folders for each of our currently installed themes. These are the same themes you saw in the wp-admin site in the themes tab.
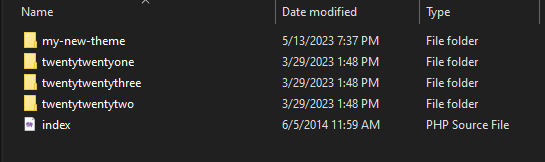
- To create a new theme, all we need to do is add a new folder within the 'themes' folder. We can name it anything that we like. I called mine 'my-new-theme' for simplicity.
- Next we will be adding 2 files into this folder. These will initialize the new theme and allow us to view it in the 'Themes' tab of our admin site. More on that in a bit.
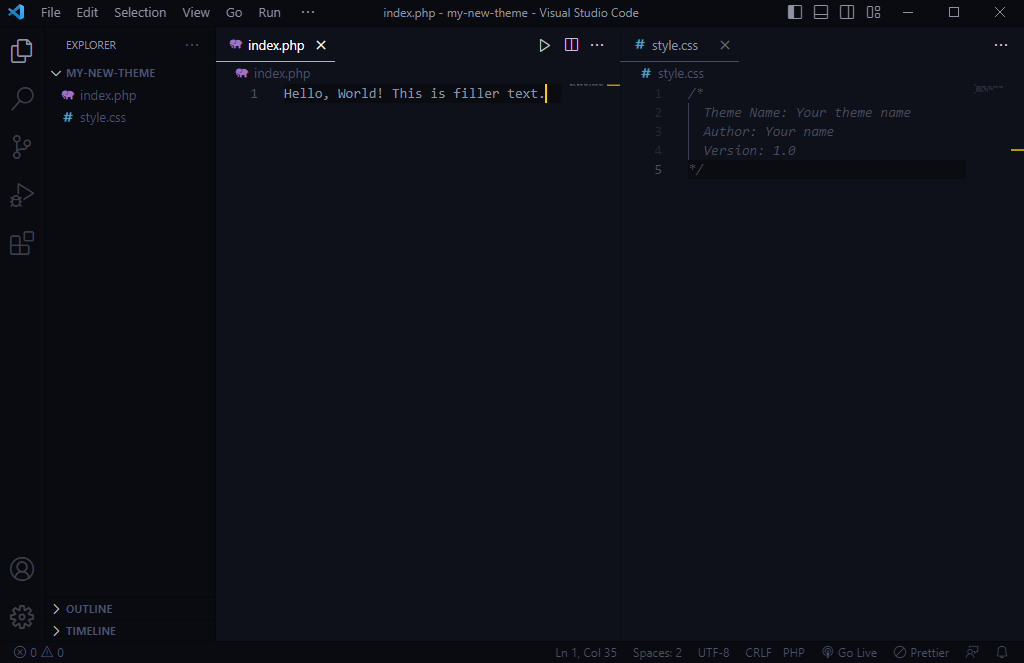
- Open this newly created folder with our text editor of choice. The name of the first file we will create will be called 'index.php'. Feel free to add some simple placeholder text into this file to start with. Something like 'Hello, World!', etc.
- The name of the second file we will create MUST be called 'style.css'. The first thing we'll add to this CSS file, on the first line, MUST be a multi-line comment. IE: /* */. Here is how both files should look...
- The above comment has to have a theme name, your name, and the version number. Replace 'Your theme name' and 'Your name' with the correct info. WordPress is coded to look for this specific file, as well as the comment at the top in order to know that it's a new theme.
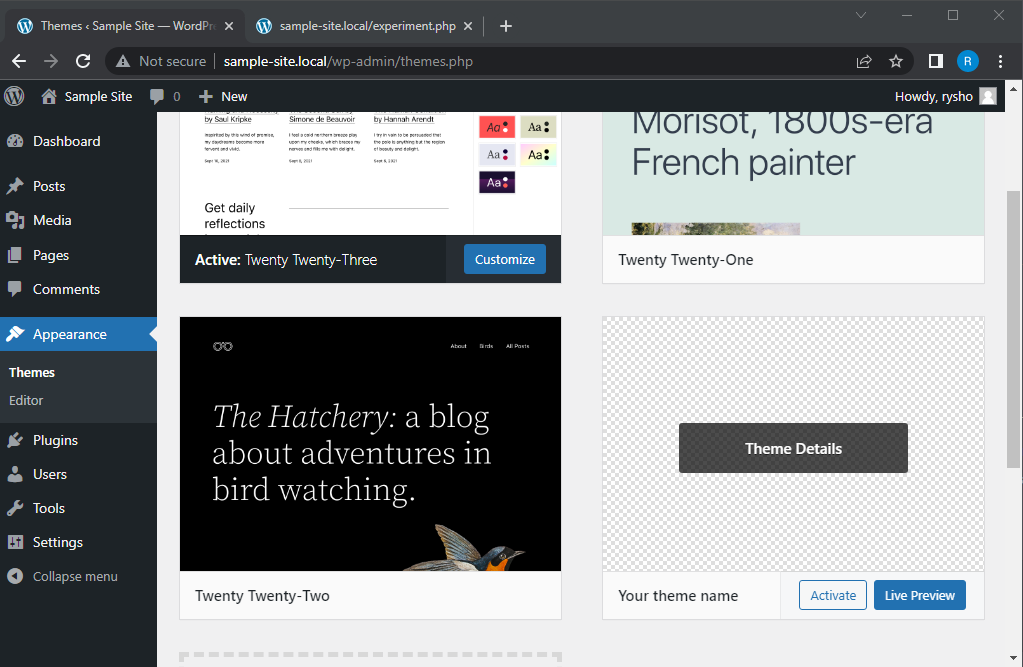
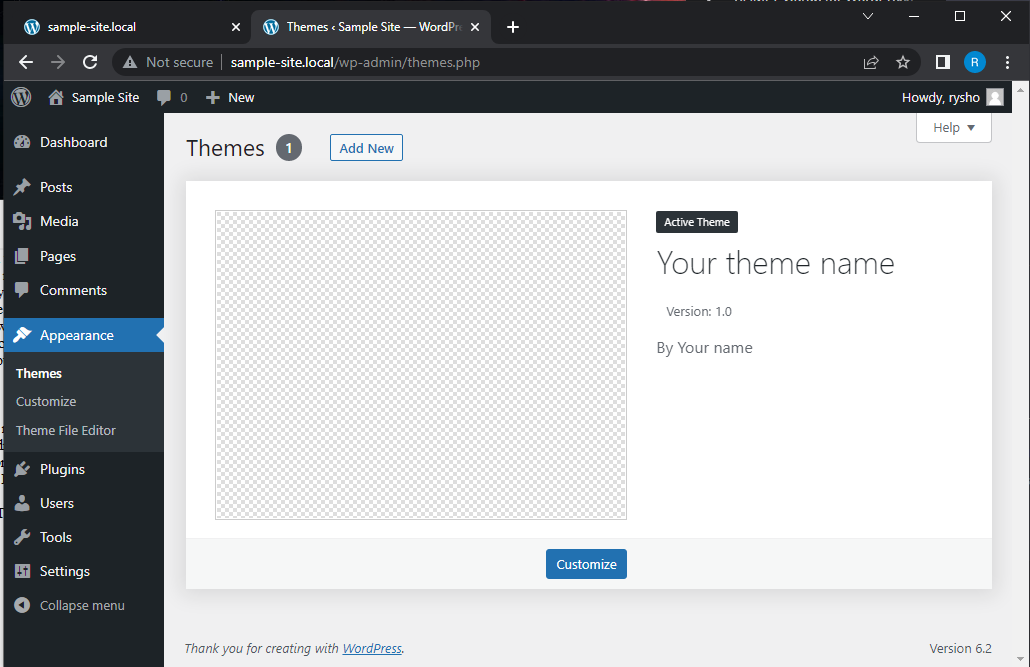
- Once we have entered our information, making sure to save both files, navigate back to our admin page and refresh the 'Themes' tab. We should now see our newly created theme! If we click on the new theme, we can see that it has the information we provided in the style.css comment. However, we also notice that it doesn't seem to have a photo like the other themes have.
- It's not necessary to have a photo for your project right away. But you should still know how to add one when the time comes.
- Navigate to the folder where your theme is located. This is the same folder that contains the 'index.php' and 'style.css' files you created earlier.
- Inside this folder, and add an image file. It's CRUCIAL to name the image file 'screenshot.png'. The image format must be PNG, not JPG or any other format. WordPress specifically looks for this exact file name. It's recommended to have the image dimensions around 1200 pixels wide by 900 pixels tall. While it doesn't have to be exact, keeping the size similar to other themes will help maintain consistency. Once you've added the image, refresh the admin page. You will now see the newly added photo in your theme. It's important to remember that you can perform this step at any time. If you haven't built your theme yet, there's no need to worry about adding a picture.
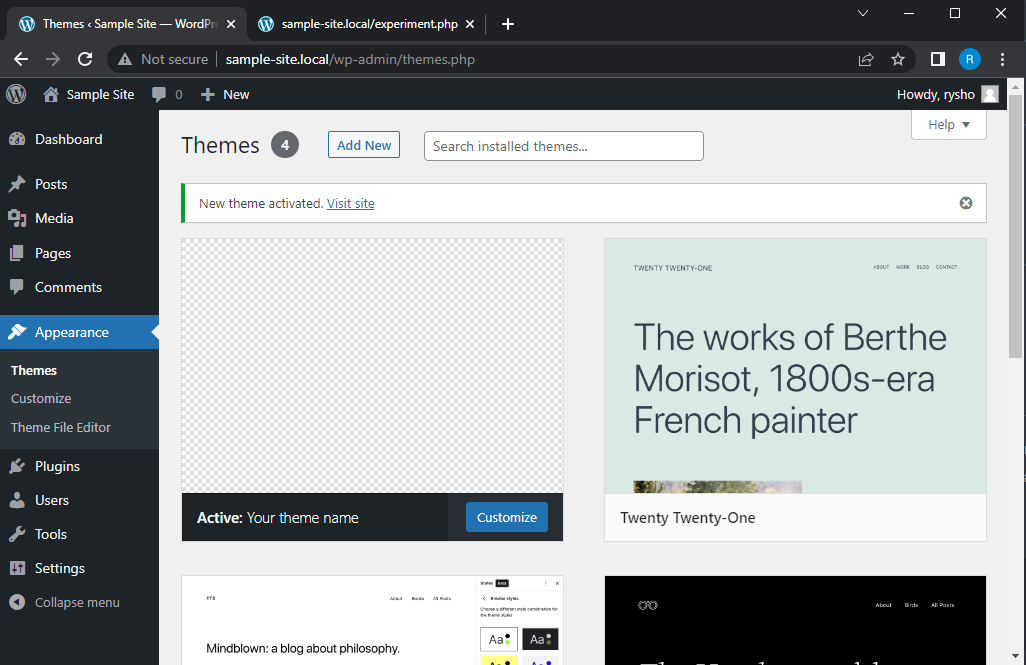
- Now we need to 'activate' the theme. This is easy to do, simply click on your new theme in the admin page, and at the bottom there is a button labled 'Activate'. Click it.
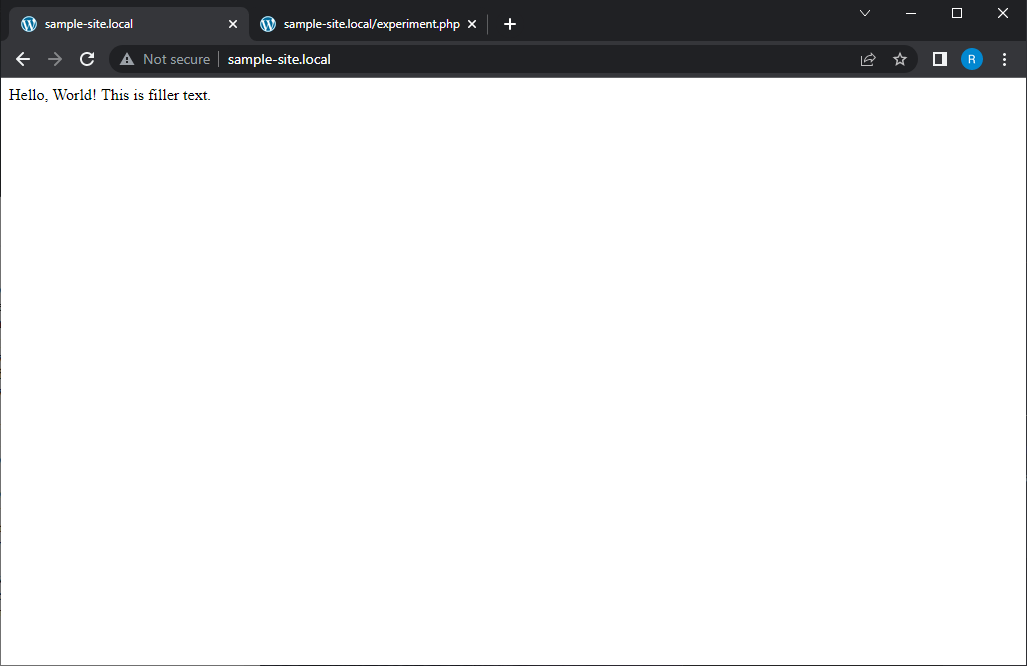
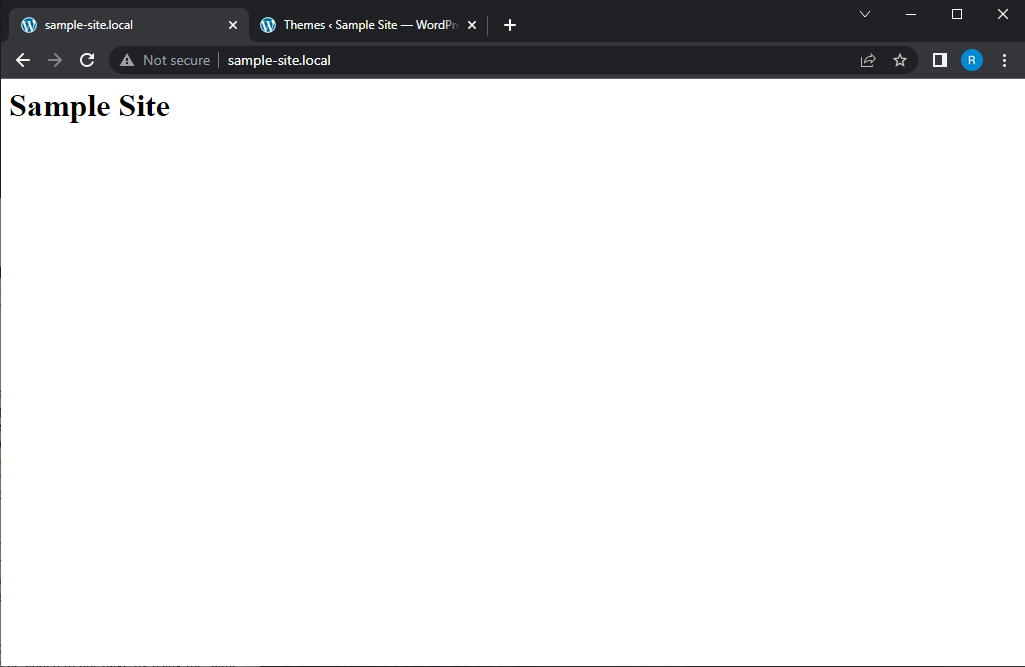
- Once you activate the new theme, you'll be redirected back to the 'Themes' overview page. Look for a banner at the top of the page that says 'New theme activated. Visit site' and click on 'Visit site'. Now, you'll see the placeholder text you added to the 'index.php' file earlier!
- Now you can go back to your text editor and make updates to the 'index.php' file. Feel free to add some different filler text. After saving your changes, simply refresh the project browser to see the new updates.
- Now that our theme is working and we can see it in the browser, we can safely remove the other themes from the main project themes folder if we wish! Since we will only be working with our own theme, it makes sense to remove the other pre-installed themes. Navigate back to the 'themes' folder within your poject, where you just created the new theme, and delete the other 3. (You don't HAVE to do this, but I always do. It is up to you. But make sure to LEAVE the index.php file in this folder in place!) Now if we navigate back to the admin page and refresh, we should only see our newly created theme is the only one available.
C:\Users\your-name\Local Sites\your-WordPress-project\app\public\wp-content\themes
Here's the CSS comment if you wish to copy and paste it into your own style.css file!
/*
  Theme Name: Your theme name
  Author: Your name
  Version: 1.0
*/
Here's an important thing to note: If you've tried modifying the 'style.css' file to make changes to the content in your 'index.php' file, you may have noticed that it didn't work. Don't worry, you haven't done anything wrong! The reason it didn't work is that loading CSS files in WordPress requires a different approach. But don't fret! In a later part of the tutorial, I'll guide you through the exact steps to load your CSS and JavaScript files. But before we dive into that, let's explore FUNCTIONS, which will be an exciting topic for JavaScript coders!
Working with Functions...
The very basics of functions in PHP.
So what exactly is a function? A function is a simple set of instructions that you write that tells a computer what to do!
Lets navigate back to our text editor and dive back into the 'index.php' file that is currently holding our placeholder text. Go ahead and remove that text.
First, lets drop into PHP mode. Remember this is done by using the syntax <?php making sure not to forget the closing tag ?>. It is common to break these tags into new lines, like so...
<?php

     write code here

?>
Note the indentation in between the php tags. This helps to keep our code readable especially when it becomes many lines long.
Lets try something: Lets see if we can echo to the browser the value produced by adding 10 and 1. The way we would do this with PHP is...
<?php

    echo 10 + 1;

?>
If you saved the file and refeshed the browser while on our project page, you'll now see '11' on the page where the placeholder text used to be! Now lets take a closer look at a function. Remember it is just a simple set of instructions!
<?php
  function addTwoNumbers($num1, $num2){
    echo $num1 + $num2;
  }

  addTwoNumbers(10, 2);
?>
If you have worked with JavaScript before, this might look familiar. We define a function using the 'function' keyword, followed immediately by the function's name. Inside the parentheses '( )' that follow the function name, we can include variables as placeholders to hold the values we want to work with. These are typically referred to as parameters. In this example, we are adding two numbers together, so we define two variables $num1 and $num2. These variables will store the numbers that we pass into the function when we run or 'call' it later. The curly braces '{ }' are used to enclose the function's body, where we specify what the function should do.
To use the function, we call or invoke it by writing its name followed by parentheses. Notice at the bottom of the PHP block, we see addTwoNumbers(10, 2);. Inside the parentheses, we pass the actual values we want to use as arguments. For instance, if we pass the numbers 10 and 2 as arguments, they will be assigned to $num1 and $num2 respectively. This allows the function to perform the addition operation. It's important to note that a function will ONLY run when it's called. Calling the function triggers its execution and produces the desired output! Within our index.php file, we could call the function again, for example..
addTwoNumbers(10, 2);
addTwoNumbers(10, 2);
Now we would see '1212' in the browser. This is because the function is being invoked or called twice. This can be a bit confusing, because the numbers are on the same line together, however, they are still two individual values of '12'. Lets try another example.
<?php
  function echoHTMLTags(){
      echo "<p>Hello, this is my first WordPress project!</p>";
  }

  echoHTMLTags();
?>
In this example, we are echoing out some HTML to the webpage. Making sure to use double quotes, we can tell the function to echo specific HTML tags with their respective content. We would see 'Hello, this is my first WordPress project!' in the webpage where '1212' once was. Again, it is important to use DOUBLE QUOTES when echoing out from within HTML! Single quotes will not work.
It is important to note that we can DEFINE a function once, and then use it as many times as we want! If we used 3 function calls like so...
addTwoNumbers();
addTwoNumbers();
addTwoNumbers();
We would see...
Hello, this is my first WordPress project!
Hello, this is my first WordPress project!
Hello, this is my first WordPress project!
We have now learned how to define and call functions!
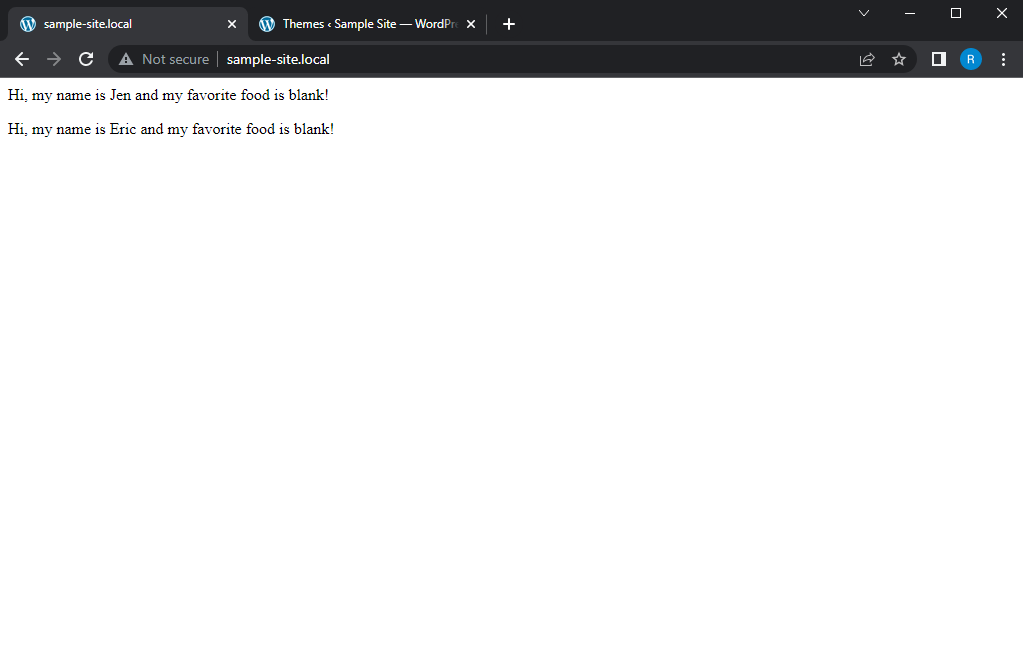
Now lets try something more advanced. Lets say we have 2 HTML paragraph elements...
<p>Hi, my name is Jen and my favorite food is pizza!</p>
<p>Hi, my name is Eric and my favorite food is Pho!</p>
Due to these lines being so similar, the only real differences being the name and the food item, we can programatically update the paragraph tags using PHP. Lets write a function that will do this. We will start with dropping into PHP at the top of our file like so...
<?php

  function paragraphReplacer(){
    echo "<p>Hi, my name is blank and my favorite food is blank!</p>";
  }
  paragraphReplacer();
  paragraphReplacer();
?>
We call this function twice, once for Jen and again for Eric. Now all we need to do is pass in the names and the food items for each paragraph element. First we will replace the name portion. Here is how that would look...
<?php

  function paragraphReplacer($name){
     echo "<p>Hi, my name is $name and my favorite food is blank!</p>";
  }

  paragraphReplacer('Jen');
  paragraphReplacer('Eric');
?>
As you can see, we have updated both function calls to now contain the name for each individual, wrapped in quotes, as well as adding a new parameter into the parentheses of the function called $name. When passing values into a functions parameters from a function call, they are refered to as ARGUMENTS. We have also updated the <p> tag to now include the newly created variable. Instead of 'blank', it now holds the variable $name. This is similar to how interpolation works with JavaScript! The only thing left to do now is add their food choices...
<?php

  function paragraphReplacer($name, $food){
     echo "<p>Hi, my name is $name and my favorite food is $food!</p>";
  }

  paragraphReplacer('Jen', 'pizza');
  paragraphReplacer('Eric', 'pho');
?>
Notice how we added another new parameter of $food into the parentheses of the function declaration, separating the two parameters with a comma ,. We have also added a new argument into each function call that will hold the individuals favorite food. We have also updated the function body, the place that holds our <p> tag, to now reflect the food choice. Now when we save and refresh our browser, we see..
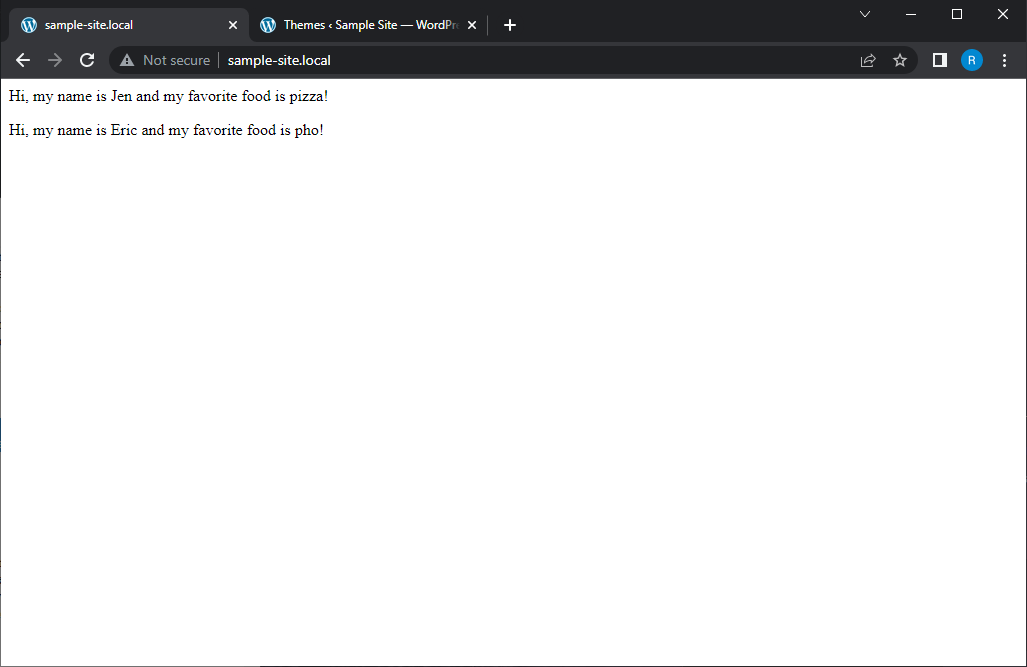
Great! We successfully created two paragraph elements using PHP, each one specifically tailored to each individual and their favorite food! You now know how to create a function, and use arguments and parameters to change what the function does!
How does this tie into WordPress?
WordPress has a plethora of pre-defined functions that we can simply call in order to use, while passing in the relevant data necessary to the function as arguments. One of these predefined functions is bloginfo();.
bloginfo(); is a WordPress core function that allows us to add data from our website into the page itself. All we need to do is provide an argument to tell WordPress what specifically we are looking for. Here is how we can do this...
<h1><?php bloginfo('name'); ?></h1>
Notice we created an <h1> element, and immediatley entered into php mode inbetween the <h1> tags. We then called the bloginfo(); function and passed in the argument of name. If we save this and refresh our page, we will now see the name of our website displayed as an <h1> element!
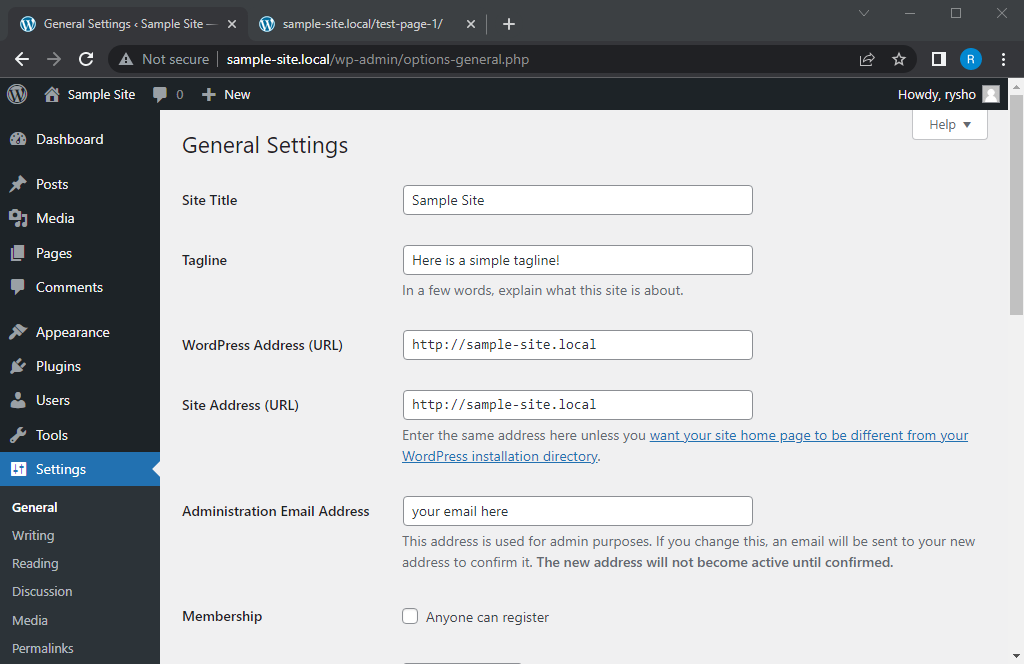
To see where this name is coming from, head back to the admin page and click on 'settings' in the sidebar. Then click on 'general'. At the top of the page you'll see an input labled 'Site Title'. This is where the name is coming from, and can be changed at any time. Just make sure to save at the bottom of the page if you change it. Also, take note of the 'Tagline', as we'll use that in a moment!
It's important to note that we didn't define the bloginfo(); function, it was abstracted from us. We just simply call the function.
Back to the Tagline from the admin page. This can be anything you want, and it too can be added to our page by using the same function. Feel free to change the tagline within admin. I will be using 'This is a simple tagline!' as a placeholder. This time we'll add our function call into a paragraph element instead of a header element. Also, make sure to save the changes in the admin site!
<p><?php bloginfo('description'); ?></p>
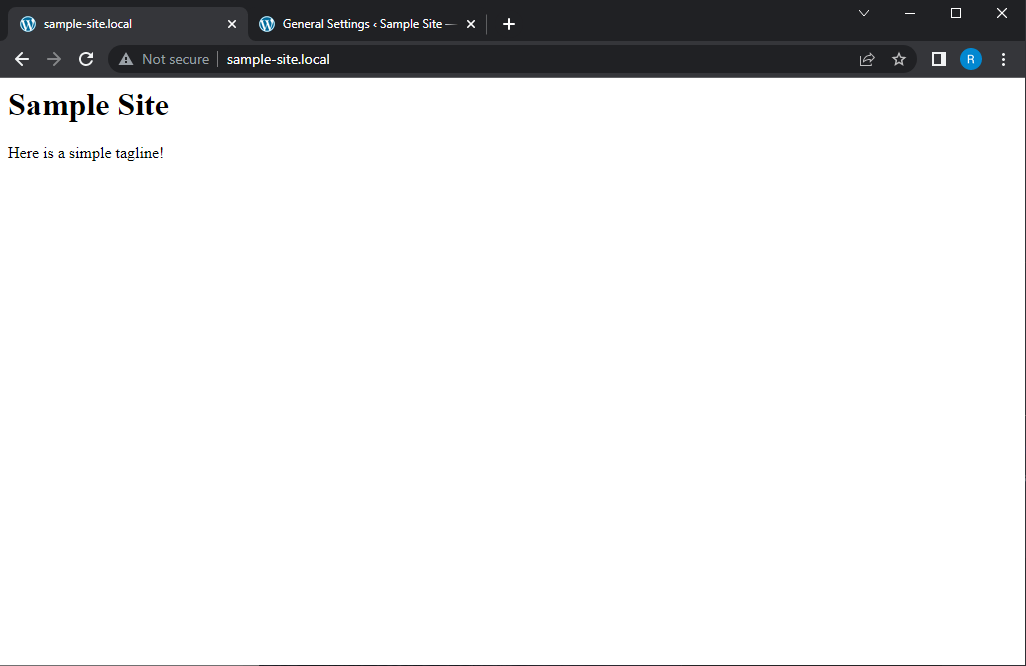
Notice that the only change is that we updated 'name' to 'description'. Now if we save our index.php file, and refresh the project, we will see our newly added appears on the page! If we change this in the admin page our website will automaticaly update to the new value. You are now familiar with PHP functions! We will dive more deeply into functions in the upcoming sections of the tutorial. That being said, our next topic will be ARRAYS.
Arrays
So what is an array?
Put simply, an array is a single value that holds multiple other values! To make it easier to understand, lets look at the code. Lets head back to our index.php file. Go ahead and delete everything within the file so we can start fresh.
Lets say we wanted to create a variable that holds our name...
<?php
  $myName = 'Ryan';
?>

<p>Hello, my name is <?php echo $myName; ?>.</p>
In this instance, we are creating a variable called $myName and setting it equal to 'Ryan'. In this case, we are storing a single value to the variable. But what if we wanted to store multiple values or names to a single variable?
<?php
  $names = ['Ryan', 'John', 'Tyler', 'Alice', 'Jess'];
?>

<p>Hi, my name is <?php echo $names[0]; ?>!</p>
What we've done is declare a new variable called $names and set it equal to a pair of square brackets: [ ]. In those brackets we can add individual names, making sure to use quotation marks and commas to separate the values. From here, we create a <p> tag and using PHP we ask for the $names array, along with whatever is in the first index of that array. We target the first element with '[0]'.
Now is a good time to point out that arrays are ZERO INDEXED, meaning that the first item in the array has the index of 0, not 1. Most programming languages work in this same way.
If we asked for $names[1], we would get 'John'. If we asked for $names[2], we would get 'Tyler', and so on...
Now, what if instead of showing an individual element, we wanted to loop through the array and output indivual sentences that contain each name? We could write 5 <p> tags like so...
<p>Hi, my name is <?php echo $names[0]; ?>!</p>
<p>Hi, my name is <?php echo $names[1]; ?>!</p>
<p>Hi, my name is <?php echo $names[2]; ?>!</p>
<p>Hi, my name is <?php echo $names[3]; ?>!</p>
<p>Hi, my name is <?php echo $names[4]; ?>!</p>
This would work, but it doesn't look very good. Imagine if we had an array with thousands of names! 😵 There must be a better way because the above is horribly inefficent.
Enter the while loop.
<?php
  $names = ['Ryan', 'John', 'Tyler', 'Alice', 'Jess'];

  $count = 1;

  while($count <= 100){
    echo "<li>$count</li>";
    $count++;
  }
?>
What you see above is known as a while loop. Take note of the new variable called $count above it. This is being used to actually count within the loop until it meets a specified stopping point.
Now take a look at the while loop. Within the parentheses, we see $count <= 100. This means that WHILE $count is less than or equal to 100, keep looping and stop once it hits 100. Within the while loop we are echoing out a bit of HTML. In this case, <li> tags. Within those <li> tags we are adding in whatever count is at the time of the loops progression.
Finally, and this is important, we add $count++; to the loop body. This increments the count by one each time the loop runs. If you forget to add your incrementor, you could end up with a never-ending loop, which is bad. Like a 'use up all of the available memory on your computer forcing a massive crash' kinda bad. We must ALWAYS add our incrementor!
Now, if you tried to run this code you would see a bulleted list of all the numbers 1 - 100. This is good, it means our loop is working properly! If we forgot our incrementor, we would see the loop continually output <li> elements to the page that each contain the number '1' indefinetley, eventually griding our computers processing power to a halt. If you DO forget the incrementor, simply close the browser tab and open up a new one ONLY AFTER fixing the loop, otherwise you'll end up back in the same situation.
Loops can be tricky to work with when starting out, so I strongly recommend playing around with loops on your own to get comfortable with them!
Back to business...
Lets get back to looping through our array of names.
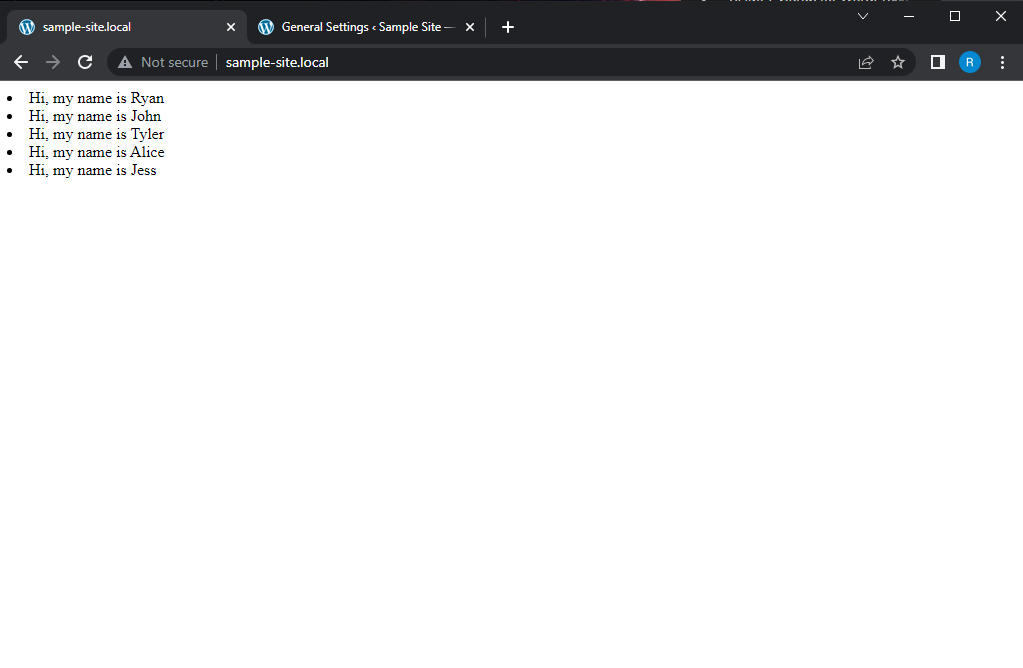
<?php
  $names = ['Ryan', 'John', 'Tyler', 'Alice', 'Jess'];

  $count = 0;

  while($count < count($names)){
    echo "<li>Hi, my name is $names[$count]</li>";
    $count++;
  }
?>
As you can see we still have a $count variable, and we are using that within not only the loop condition, but also within the loop body when creating our li elements.
It is important to note that while loops only run while the thing inside of the ( ) is true. Once it is no longer true, like in the previous example once $count hits 100, the loop stops running.
We're using the count($names) method inside of the ( ) to determine when this loop needs to stop, and passing in our array of names. This will count up the total amount of items in the array and use that to determine our stopping point! Then we echo out <li> elements that hold the sentence 'Hi, my name is blank!' Replace 'blank' with a simple bit of PHP syntax like $names[$count] to add each name into a sentence to be echoed out. Each time the loop runs, it grabs the next name in succession, starting out with the first name, at index 0. Most importantly, we have our $count++ incrementor counting up by one each time the loop runs. Now, if you ran the code, the output should look like this...
If you're coming from another language, for instance JavaScript, you may be wondering why we arent using PHP's version of a foreach loop or maybe a for loop. This is because while loops are used a LOT within PHP when dealing with looping over posts and pages. Instead of an array of names, what if we had an array of blog posts that we wanted to display to our user?
The WordPress Loop
Before we start adding blog posts onto our page, lets first make sure that we have a few to add!
Head to the admin page, and click 'posts' in the sidebar. You'll see a filler post created by WordPress, this is normal. From here, we can add new posts to our page to be displayed. Go ahead and add two new posts by clicking on 'Add New' at the top. Name them whatever you want and use any filler content you'd like for the content portion. I'll be naming them 'Test post 1' and 'Test post 2', and simply copy/pasting the words 'filler content' into the content section.
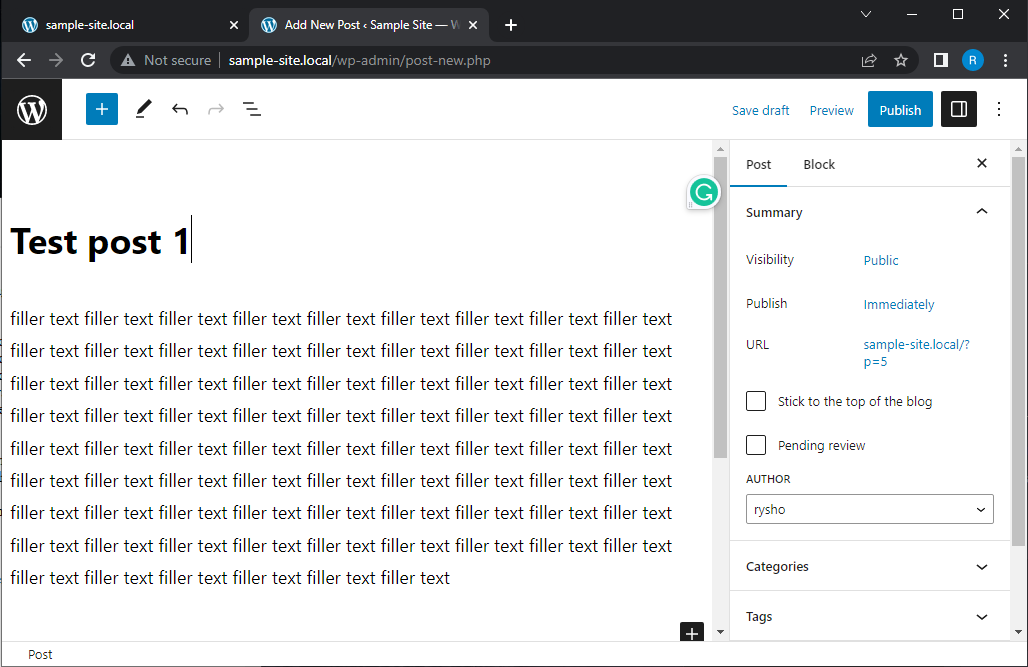
When finished editing a post, click the 'Publish' button in the top right-hand side. Then repeat for the second post. Make sure to publish them both! Both of my test posts will look the same expect for the name, but you can add in whatever content you wish.
Next we're going to learn how to loop through these posts and display them on the webpage!
Lets head back to our text editor and work in our index.php file. Go ahead and delete all of the old code in there so we can start fresh. Add the following...
<?php
  while(have_posts()){
    the_post(); ?>

    <h2>Hello</h2>

  <?php }
?>
Now, this is where it can get confusing. First, take note of the two new WordPress functions we are using:
have_posts(); and the_post();
Next, take note of the the_post(); function. This is being used to output the post itself to the page. It isn't working exactly as we want it to yet, and that is intentional! Also, take note of the fact that we are exiting PHP directly after the the_post(); call, only to dive back into PHP mode directly before the closing curly brace }, when it then ends just after that curly brace. Everyting inbetween the ?> after the_post(); and the <?php directly before the closing bracket is essentially plain html. We can break up our html in a lot of creative ways using PHP!
If we run this code, we should see...
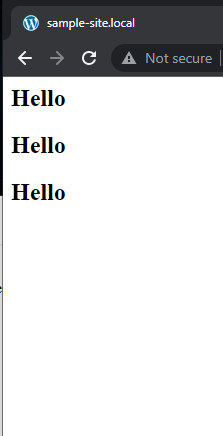
However, showing 'hello' three times isn't exactly what we want to do. With one simple change, and I do mean simple, we can show the titles of our posts instead. Observe...
<?php
  while(have_posts()){
    the_post(); ?>

    <h2><?php the_title(); ?></h2>

  <?php }
?>
The ONLY thing we changed was the content within the <h2> tag to a function call called the_title(); within php mode inside of the <h2> tag. If we run this code in the browser, we see...
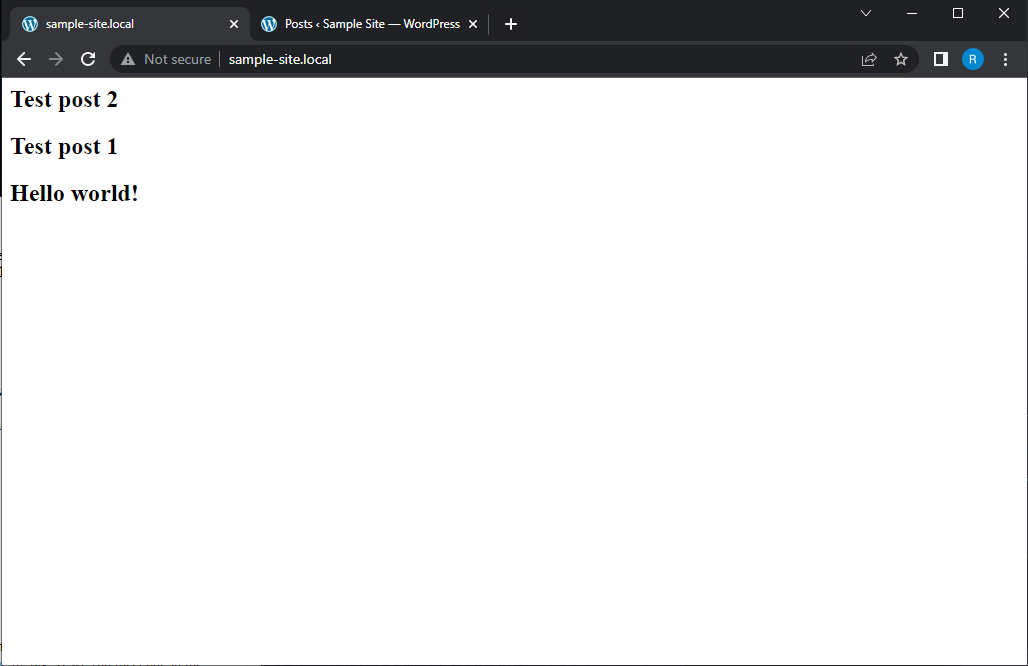
Huzzah! Now we see the names of our posts on the page. The 'Hello world!' post was the original pre-built post that WordPress adds to your project as a placeholder. Next lets add the body content below each title using the following update to our code.
<?php
  while(have_posts()){
    the_post(); ?>

    <h2><?php the_title(); ?></h2>

    <?php the_content(); ?>
    <hr>
  <?php }
?>
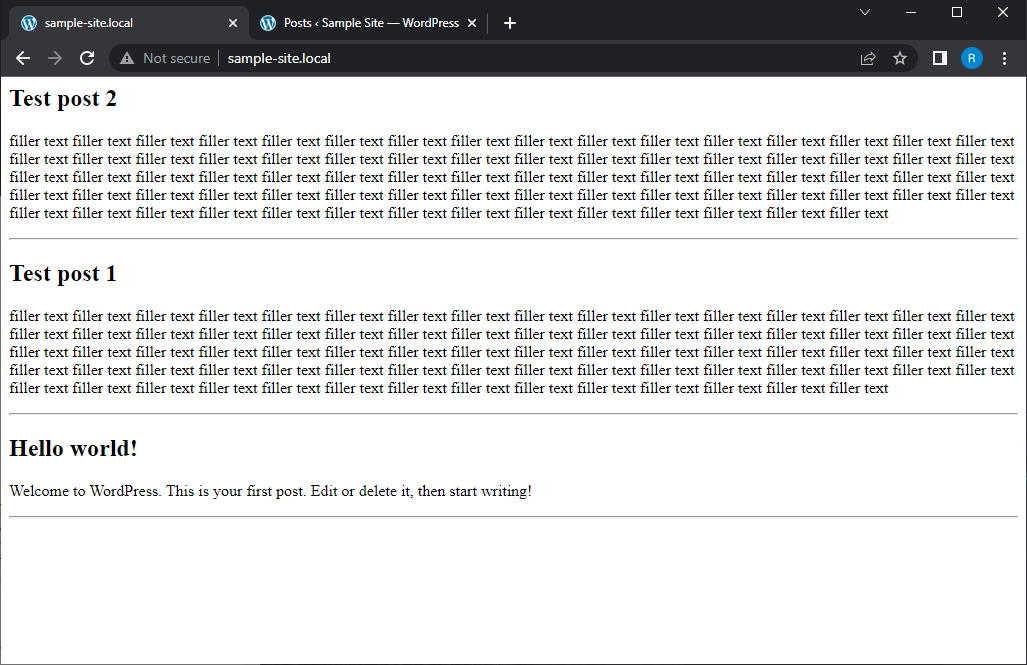
Notice that we replaced the content in the old <h2> tags with a bit of PHP code. We drop into php and call a wordpress function called, you guessed it, the_title();! Along with that, we added a simple horizontal rule or <hr> to add some space in between each post. Normally we'd use CSS for this, but it works in a pinch! Now we see not only the title of the post, but the content we added earlier in the admin page, too! This is incredubly useful for displayig our posts to the user.
Up next, we will add a way to click on an individual headline, and be taken to a single page that has that one particular post!
If you have experience with html, then you know the way to create a hyperlink is to use <a> tags. We can update our code to look like the following...
<?php

  while(have_posts()){
    the_post(); ?>
    <h2><a href="<?php the_permalink(); ?>"><?php the_title(); ?></a></h2>
    <?php the_content(); ?>
  <?php }

?>
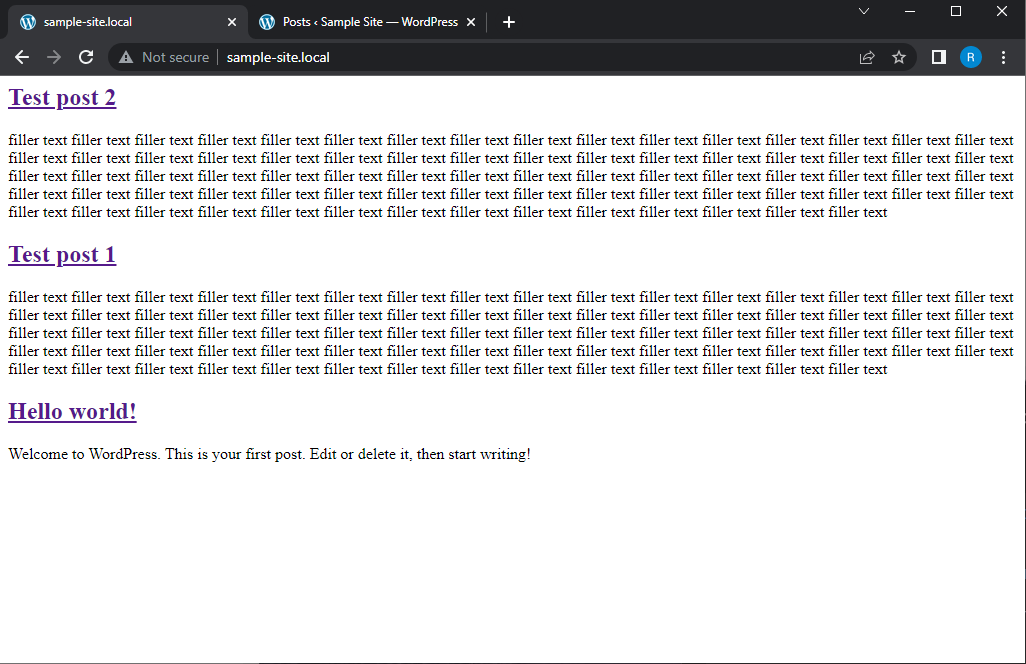
We have added an <a> tag inside of our <h2> tag, with an href value of a WordPress function called the_permalink();. This gives WordPress its target for when we click on one of the links! When we click on one of the links, we are now taken to a new page that simply contains the post itself. Pay close attention to when we are dropping in and out of PHP, as that can be confusing if you aren't familiar with coding.
Also take note of the change to the url in the address bar. WordPress knows automatically which data to display from the database when we use the the_permalink(); function! This is why, even though we are looping through ALL of the posts, only one is being displayed when we visit the posts single page.
When we are on our homepage, WordPress will fetch our 10 most recent posts and display them from the database in the page.
You may have noticed that the headline for our single post page is STILL a hyperlink. This doesn't make much sense since we are already on the post page itself. We only want the title to be a link while we are on the home page. Lets go learn how to remove that.
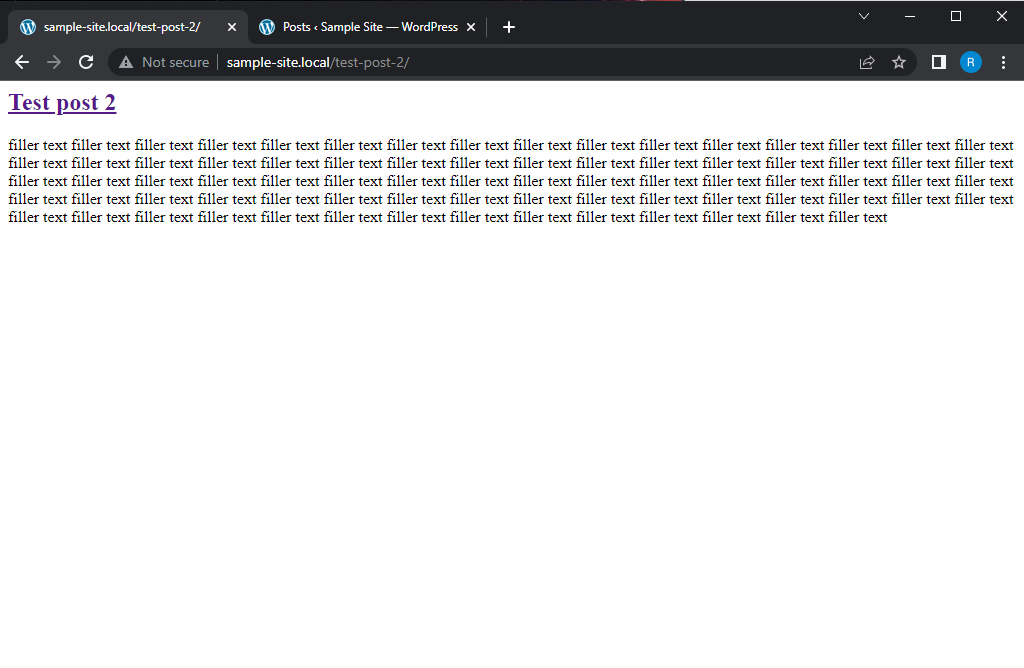
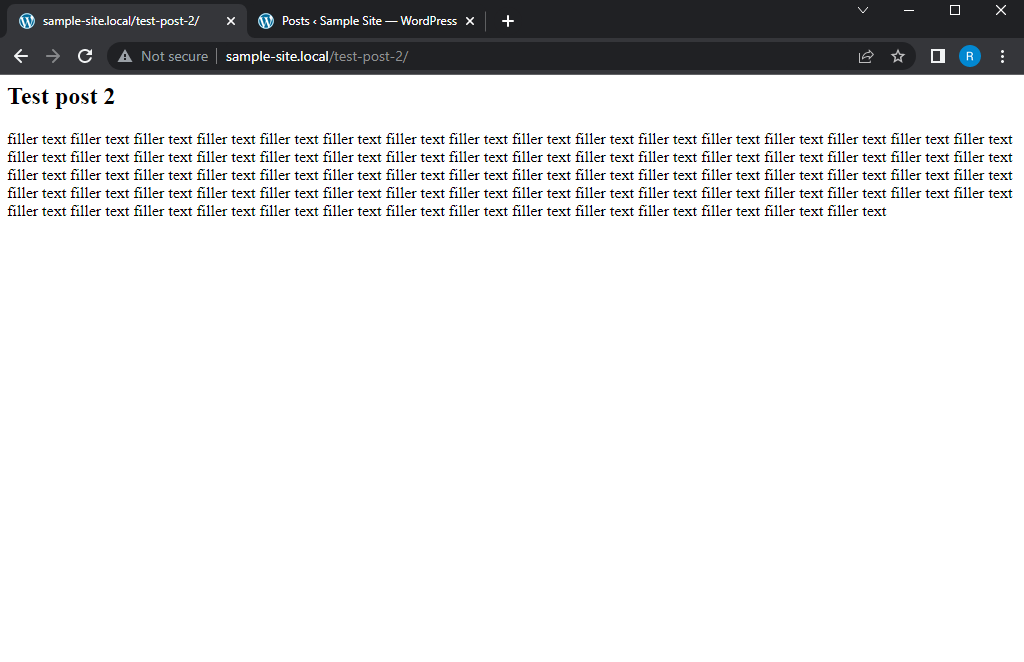
First, we will create a new file in our theme folder. We will call this new file 'single.php'. Within the new single.php file, go ahead and add some filler text, save the file and refresh the browser. Ensure you are on a single post page and not the homepage!
We will now see that filler text when we are on the page for single posts. That's good! It means that wordpress is identifying the 'single.php' file and acting accordingly.
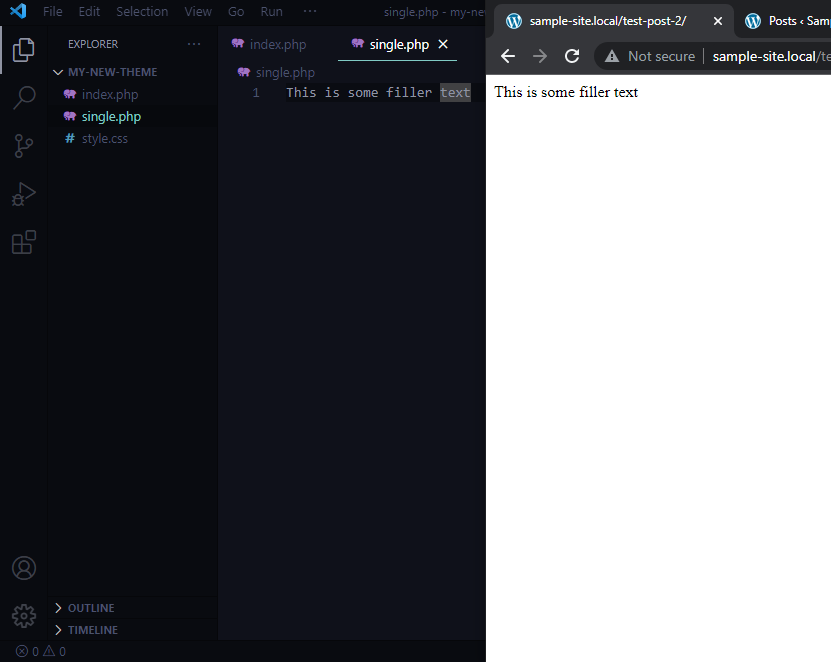
Our main page is being handled by index.php, meanwhile our single post page is now being handled by single.php! What this means is that depending on the current url, wordpress is on the lookout for different file names within our theme folder. If we do not have a single.php file, wordpress will use the index.php file as the default.
Back to business!
Lets navigate back to our text editor and into the index file. We are going to copy everything from within that file and past it into our single.php file replacing the filler text, with a few changes.
Update your code in single.php to resemble to following. Note that all we did was remove the <a> tags from around the the_title(); function call...
<?php

  while(have_posts()){
    the_post(); ?>
    <h2><?php the_title(); ?></h2>
    <?php the_content(); ?>
  <?php }

?>
Now the individual post title is no longer a hyperlink on the single post page. Much more professional! On the homepage each headline is a link, however, once we click on one individually, the link is removed.
Congrats on making it this far! You now know the basics on creating and working with posts in WordPress! 🎉🎊
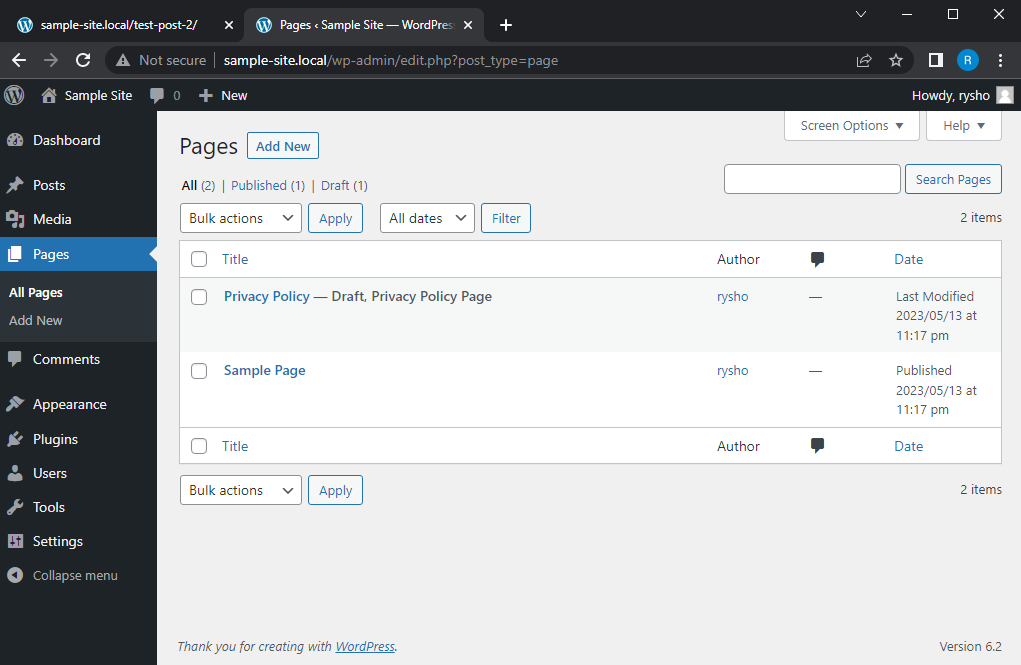
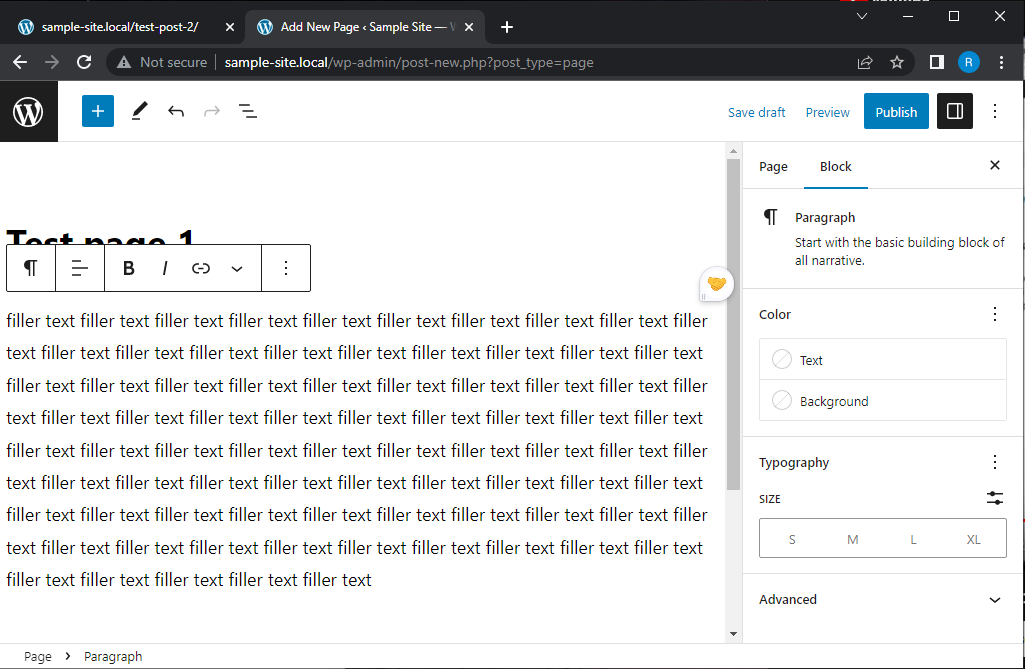
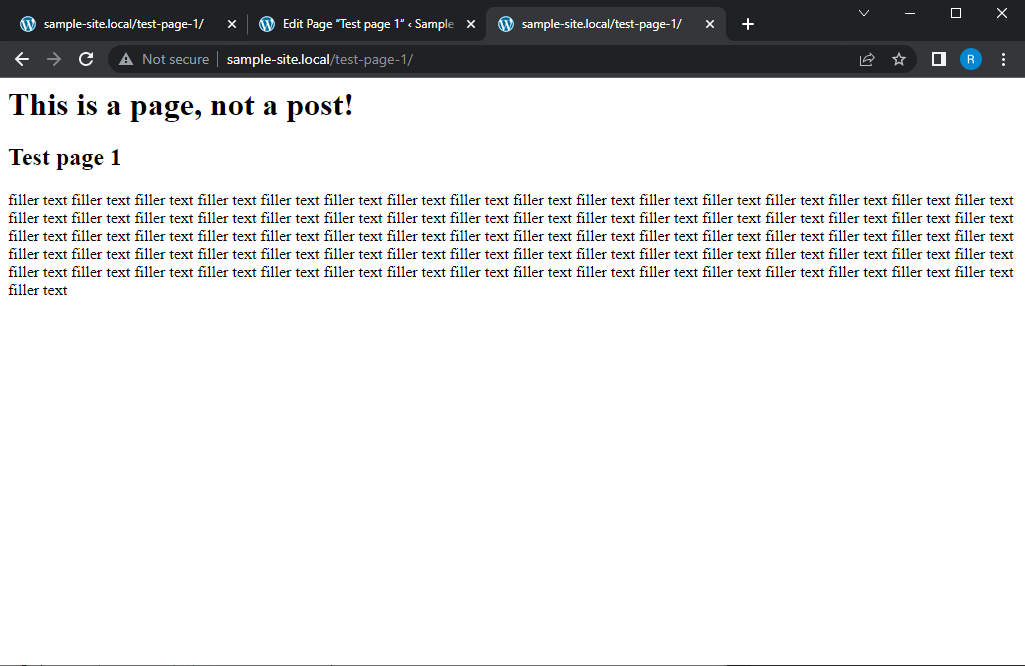
But posts aren't everything WordPress is capable of. We also have the ability to work with pages, too! Lets navigate back to our admin page and click on the 'Pages' tab in the sidebar. From there, go ahead and add a new page using the button at the top. I will call mine 'Test page 1'. Make sure to publish it like you did with your posts!
We can also view this new page by clicking on the 'Test page 1' link. It should say 'Test page 1 is now live.' We will notice our url is now http://sample-site.local/test-page-1/
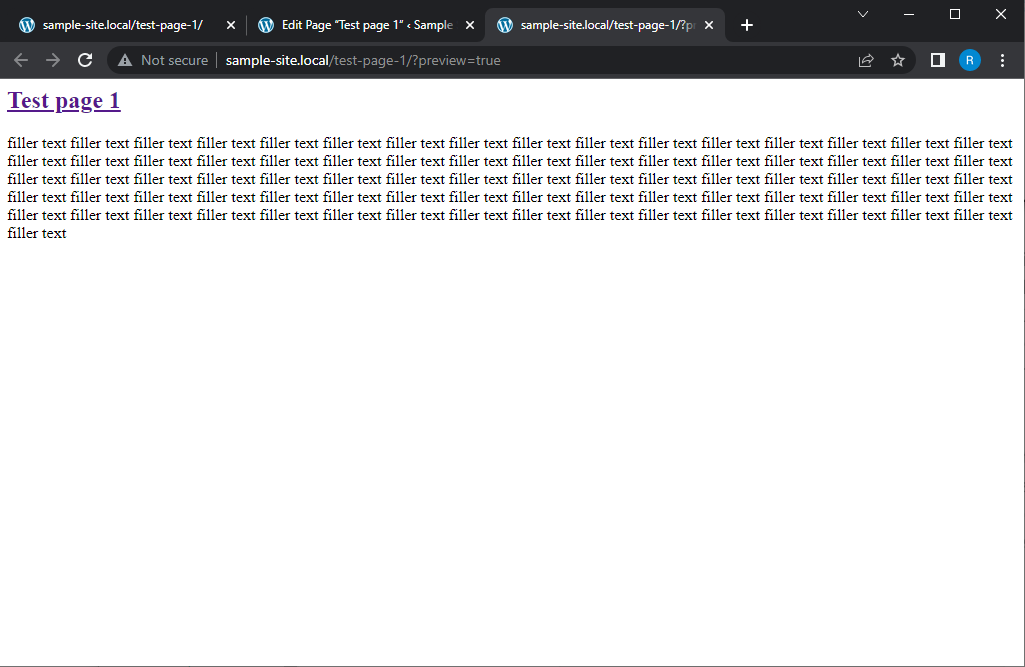
Now, one thing to take note of is that the headline is STILL a link, which means that the new page is being powered by index.php instead of single.php. This is because wordpress uses the single.php file for single post pages ONLY. To work with a new page, WordPress is looking for a file called 'page.php'. Remember, WordPress will automatically default back to index.php if it can't find the correct file.
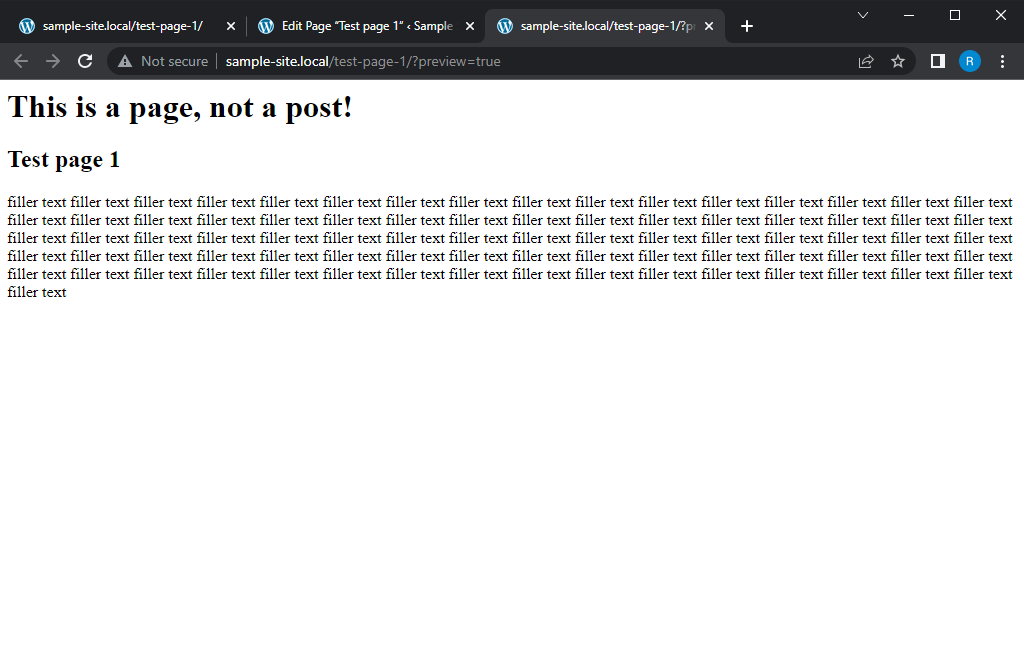
Lets go ahead and add a new file called page.php in our folder with the other files we've created so far. After that, simply copy all of the code from single.php over to the new page.php file, but lets make a quick change so that we know for a fact it is using the page.php file and not the single.php file.
<?php

  while(have_posts()){
    the_post(); ?>
    <h1>This is a page, not a post!</h1>
    <h2><?php the_title(); ?></h2>
    <?php the_content(); ?>
  <?php }

?>
Notice we added a new <h1> element that will appear after we save and refresh the page. This should prove that the single page is now being powered by the page.php file. So to review, our homepage is being powered by index.php, our single post pages are being powered by single.php, and our individual pages are being powered by page.php.
One thing you've probably noticed at this point is that even though the files are different, they are ALL using a loop! This is refered to as 'The Loop' or 'The Wordpress Loop'. Every WordPress developer will know what you are talking about when you mention The Loop! This is why loops are so crucial to WordPress development, they are used all the time. The loop is at the heart and soul of WordPress.
Up next we will learn how to create a global header and footer section that all of our pages share. This helps to keep our website nice and uniform across each of its pages.
Headers and Footers.
If you're not sure exactly what a header and a footer are, let me explain.
Our header and footer are the portions of the website that appear at the very top and bottom of the page, and typically look the same across every page.
One way, you might think, to add a header to our pages would be to navigate back to our index.php file and simply add your content above the current PHP code like so...
And at first glance, this seems to do the trick.
However, this won't work. We'd like to have the same, identical header and footer for each page of our website, so if we were to do it this way we would need to update every page on our site every time we make any changes to either the header or the footer. This can become tedious as your site grows larger.
To add to that, remember that index.php doesn't power each page of the site. It only powers our homepage. If we were to navigate to our new page, we would lose the header and footer due to that page being powered by the page.php file.
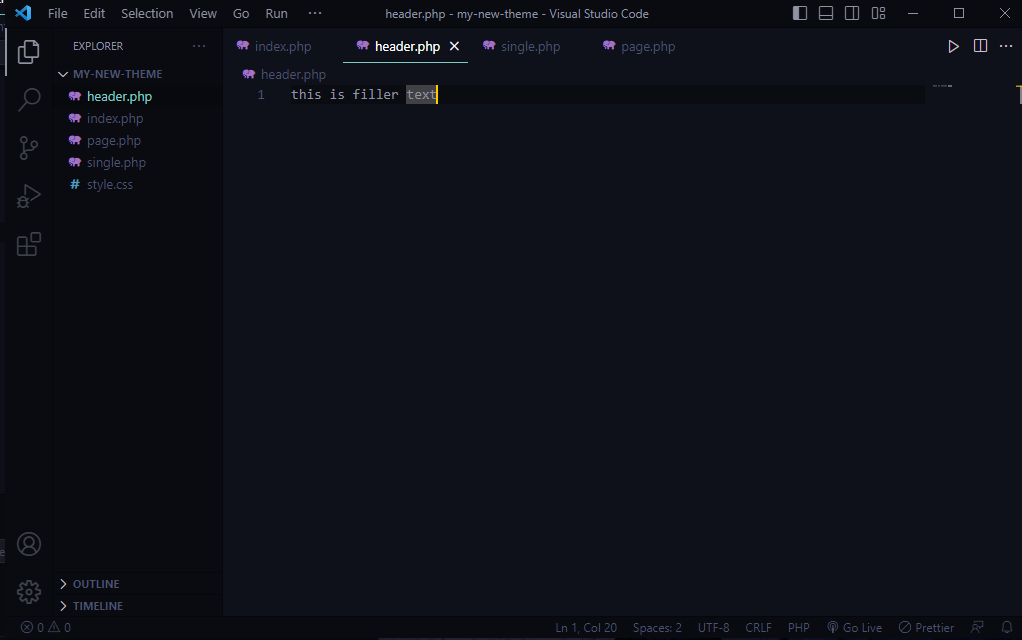
Lets examine how we can get around this. Navigate back to your text editor and lets add a new file called 'header.php'. Go ahead and add in some filler text as well. Make sure to save your file!
Now, lets head back over to index.php. If you added a header and footer in the index.php file like from the previous example, go ahead and delete it now.
Lets try a different approach. This time, we will be using another WordPress core function to make our lives a little easier.
We will be using the get_header(); function. The get header function does exactly as its name implies. It returns the header.php file we created a few moments ago!

Notice that the only update we made to the file is adding the get_header(); function just above our while loop, making sure to add it within the <php and ?>
If we save our file and give the homepage a refresh, we should see the following...
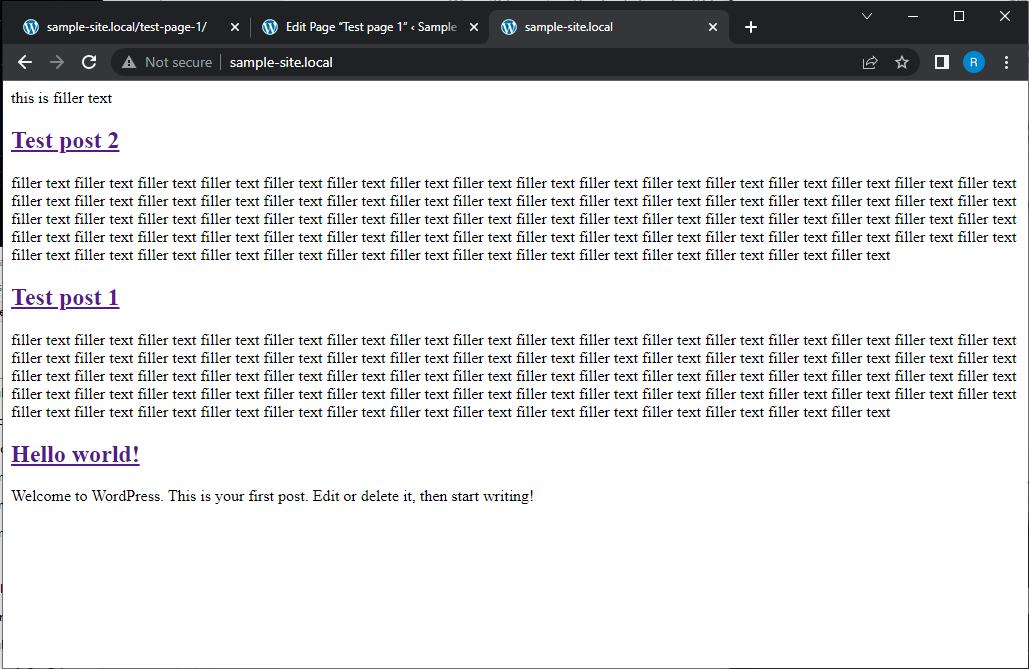
If you look closely, you'll notice that at the top of the page is the filler text we added to our header.php file! That means that our get_header(); function is working,
At this point, lets head back to header.php, and change the filler text to the following, making sure to save our file...
<h1>Hello! I am a part of the header.</h1>
Now if you navigate back to the homepage in our browser and give it a refresh, you'll see...
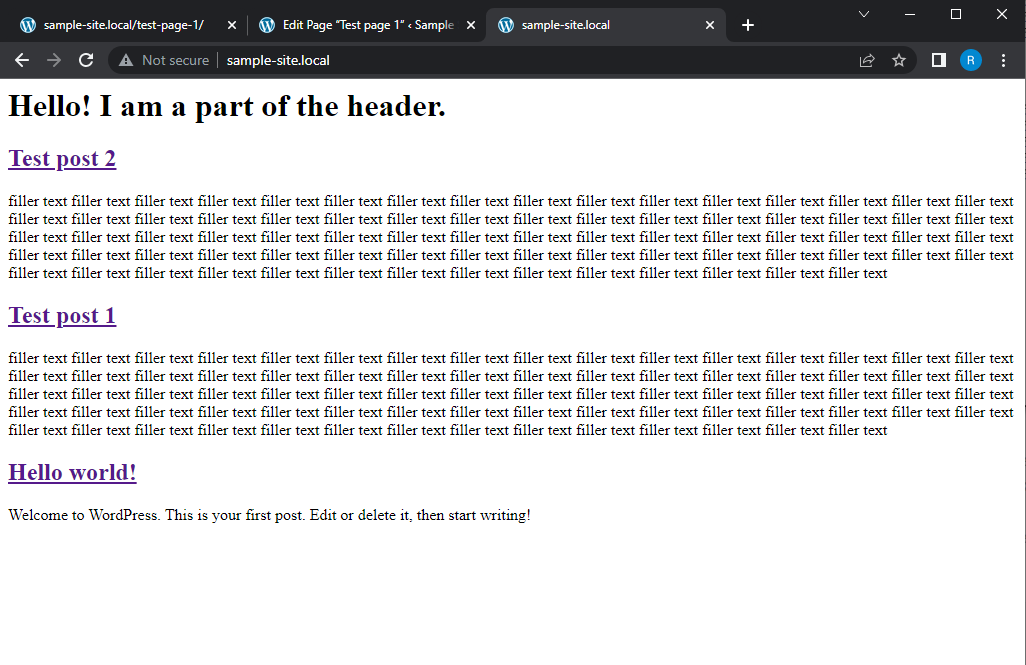
Awesome! Now we know that our header.php file is successfully being added to our homepage using the get_header(); function!
But we still have the footer to add as well. Lets go ahead and add another new file, this one titled 'footer.php'.
Go ahead and add some filler text in this file as well, for example...
<h2>Hello! I am a part of the footer!</h2>
Make sure to save your file, and then head back over to the index.php file. In here, we will be adding a new WordPress function that will allow us to pull the information from the footer.php file in the same way we pulled information from the header.php file. Can you guess what this function might be called?
<?php
  get_header();

  while(have_posts()){
    the_post(); ?>
    <h2><a href="<?php the_permalink(); ?>"><?php the_title(); ?></a></h2>
    <?php the_content(); ?>
  <?php }

  get_footer();
?>
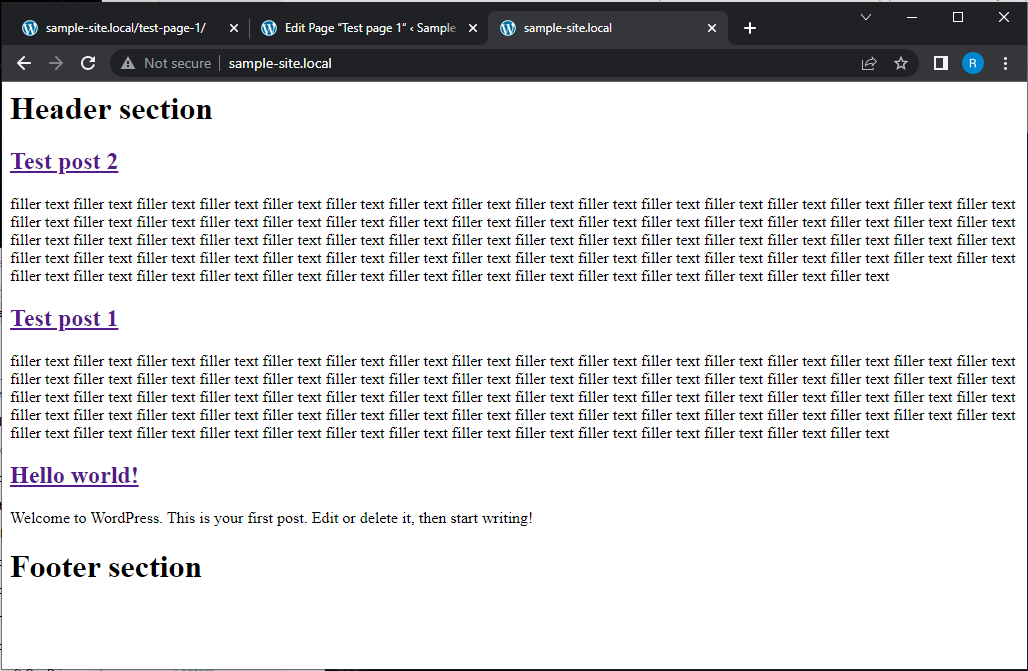
If you said get_footer();, then you are correct! Notice we added the new get_footer(); function call to the bottom, just above the final closing tag ?>. Remember, in-between the_post(); function call and the_content(); function call is just plain HTML with PHP added into the <a> tag, because we are dropping into and back out of PHP mode. Always pay close attention to the placement of the opening and closing PHP tags! Navigate back to your homepage and give it another refresh.
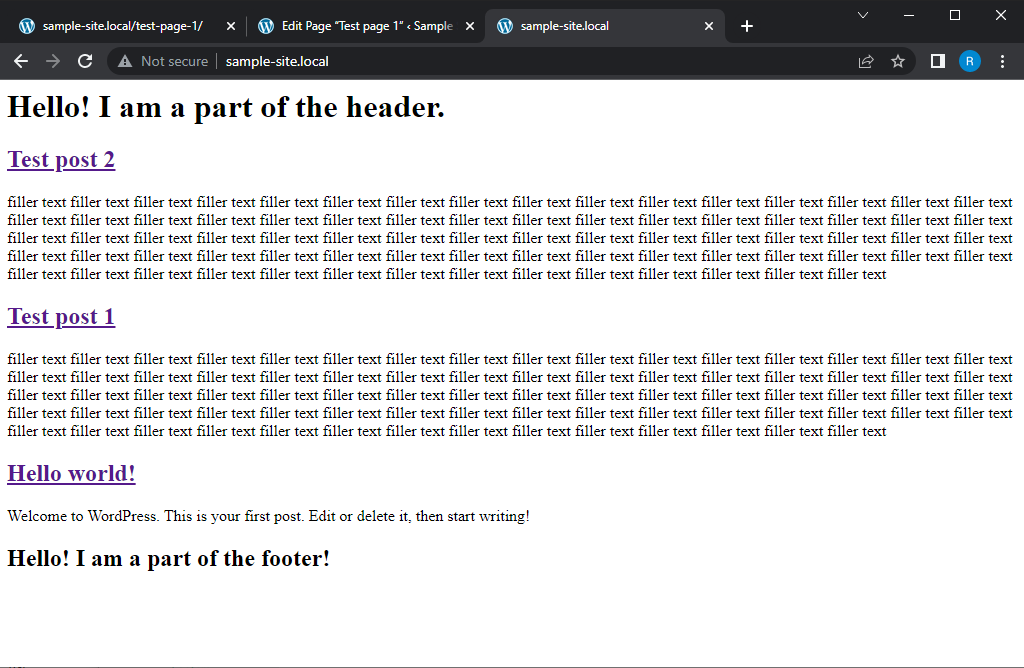
And there we have our footer. However, if you tried to click on any of the post links, you'll find that they do not have access to the header and footer. We need to make one more change in order for them to have access to our other files.
Now, because the post pages are being controlled by the single.php file, we will need to move to that file and add our get_header() and get_footer(); function calls in the same way we did for index.php. Update single.php to...
<?php
  get_header();

  while(have_posts()){
    the_post(); ?>
    <h2><?php the_title(); ?></h2>
    <?php the_content(); ?>
  <?php }

  get_footer();
?>
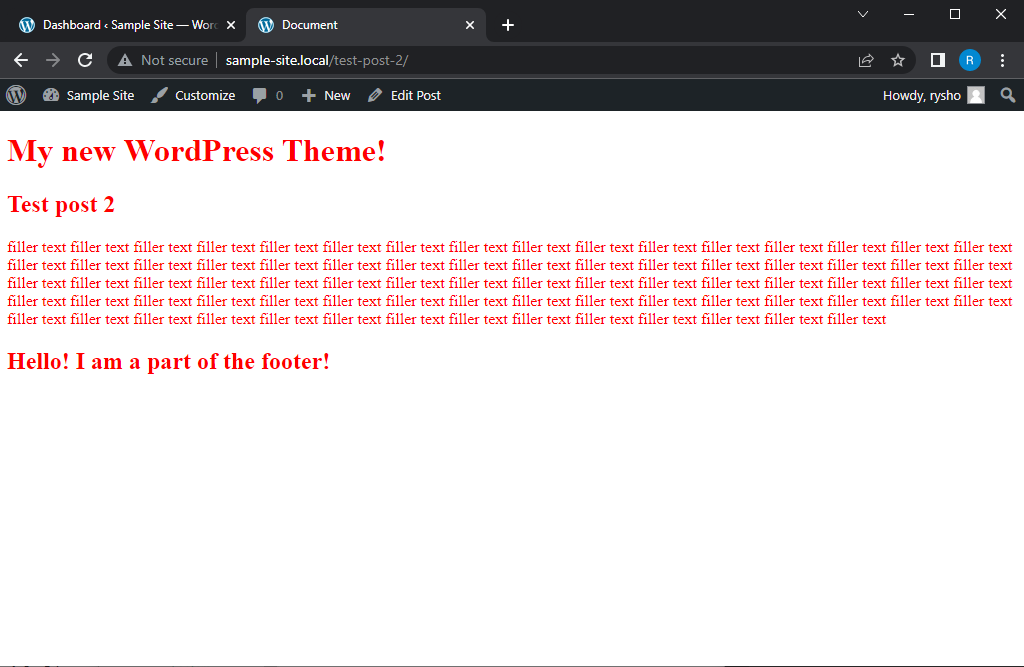
Now navigate to your browser, and from the homepage click on one of the post links. You should see...
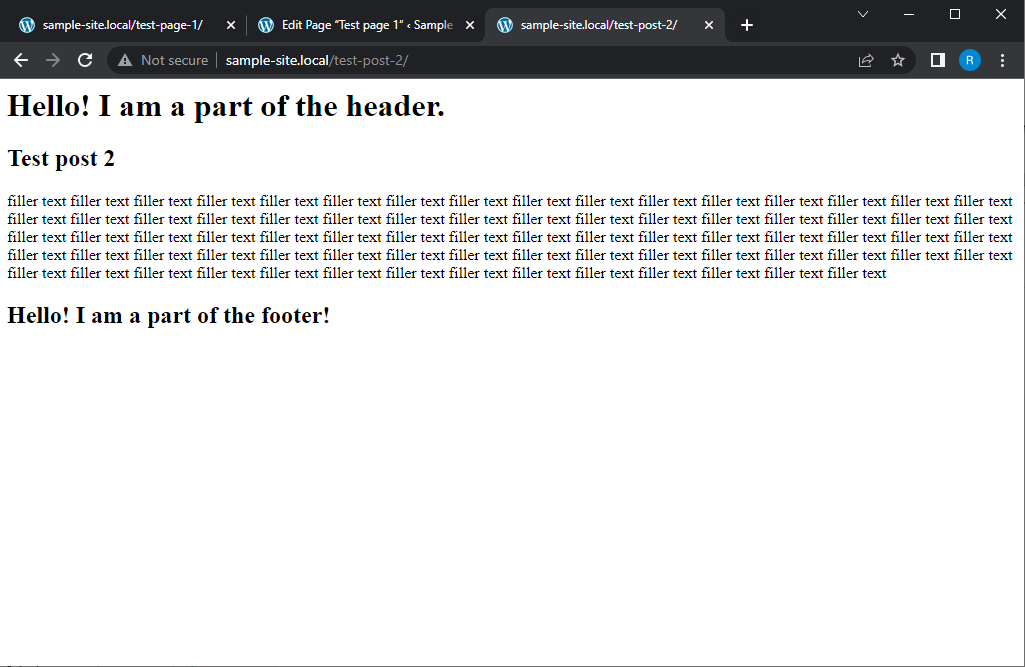
Right on, we now have the ability to have a single, uniform header and footer section across our website! Now, we have one more thing to update. Our new page we added earlier! Lets navigate back to that page. For me, the path is...
http://sample-site.local/test-page-1/
Yours will be different of course, just add whatever you called your new page to the end of the homepage url!
You can see that this page currently does not have access to the header or footer files. We must simple update our page.php file in the same exact way we did for index.php and post.php! Once the get_header(); and get_footer(); have been added to page.php, a quick refresh of the browser will now show...
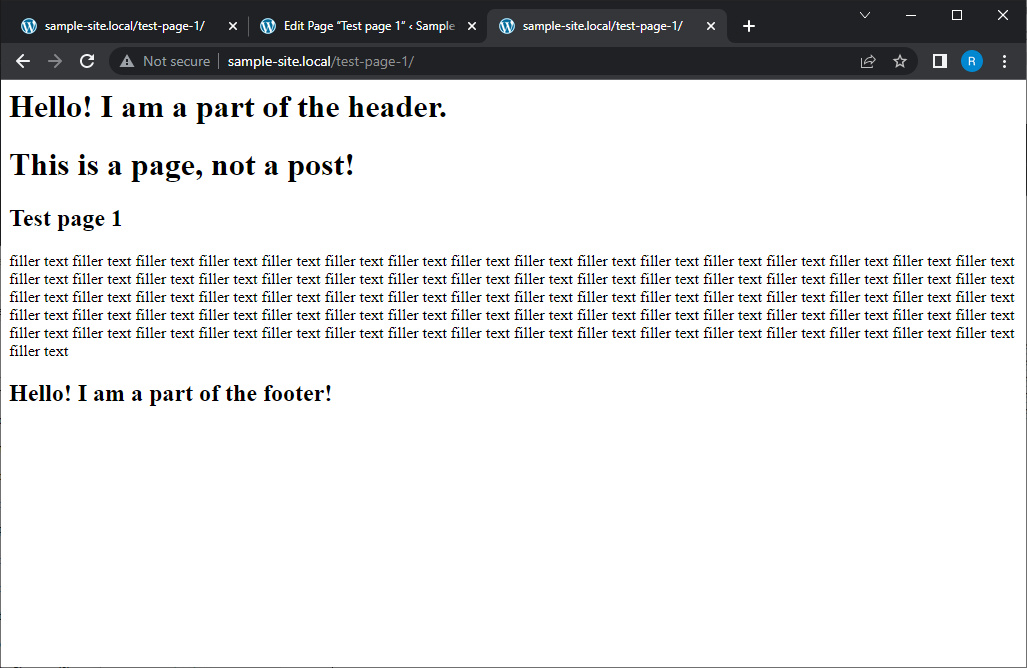
Excellent, we now have the same header and footer across all our pages. Any new posts or new pages that we create will automatically have access to the header.php and footer.php files. Up next, we are going to learn how to load our CSS files and The black WordPress menu bar into our website. This ties into our header and footer, as you will soon see!
Loading CSS and displaying the WordPress menu bar
If you aren't sure what menu bar I am referring to, it is the one in the photo below, found at the top of our admin page. This bar should be available on the front-end of our website, too. Not just on our admin page.

But first, lets start by learning how to load our CSS files into our project. We will come back to the menu bar.
If you are familiar with HTML, you likely already know how a CSS file is added to a webpage. Typically, the following line is added into the HTML documents <head> tag, just above the <body> tag.
<link rel="stylesheet" href="assets/css/main.css">
To start, lets navigate to our header.php file. This is where we will 'link' to our CSS file. Let's go ahead and delete the filler text we added so we can start anew. If you didn't know, you can simply type 'html' into our blank document, and then click on 'html: 5', VS Code will automatically fill some of the HTML code for us!
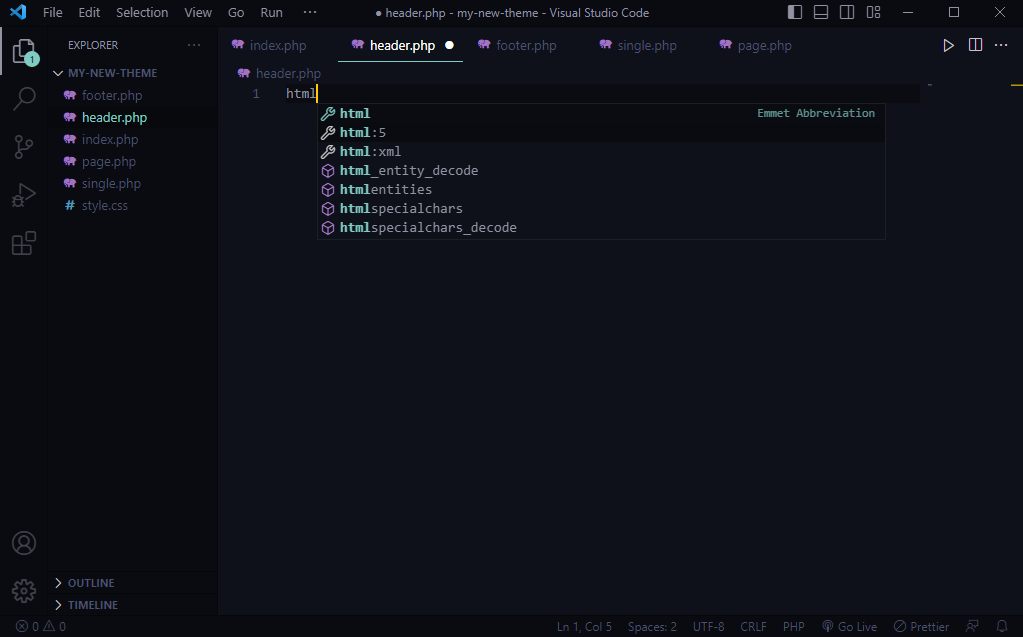
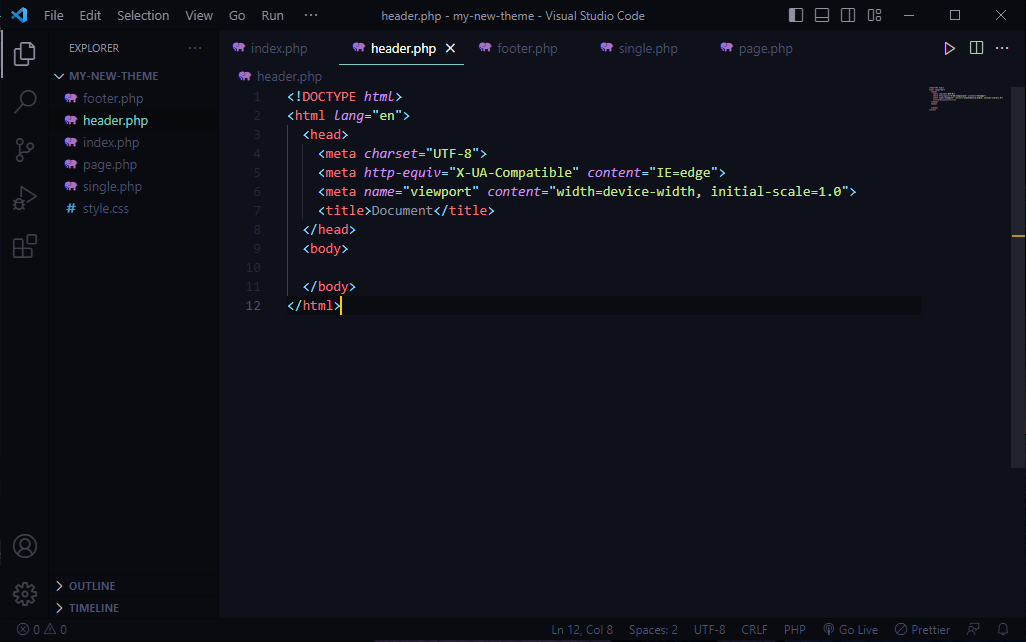
Clicking on the 'html: 5' option in the dropdown will automatically generate the following code for us...
Now, if you have HTML and CSS experience, you know that typically we would add the 'link' line from earlier into the <head> tag, directly above the <body> tag. However, if we try to do it that way when creating a WordPress website, it will not work. Instead, we must again use a predefined WordPress core function that can import our CSS for us!
The WordPress function that we will be using is called wp_head();. We will be calling this function from within the head of our header.php document like so...
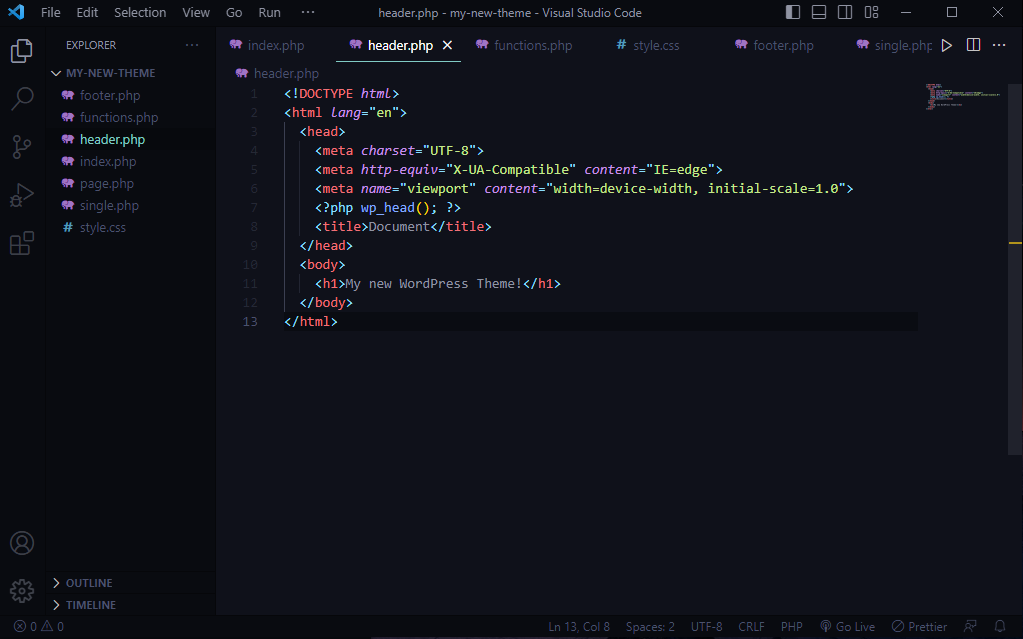
Notice that we have added a new <h1> element that says 'My new WordPress theme!', as well as on line 7, directly after the meta tags, we enter into PHP mode and call the function wp_head();. This will allow WordPress to essentially be in control of our head section! Technically, we don't need the meta tags and their data any longer since we are calling the function wp_head();, however, I typically leave them in. You can delete them if you wish. The reason for this is what if later on we decide to install some WordPress plugins to handle a complicated task for us? Those plugin files may have their own CSS files, so by using wp_head();, WordPress will automatically handle all of the typical data that goes into our <head> section as well as automatically importing those CSS files from the plugin.
Now then, with the wp_head(); function call in place, next we need to programatically tell WordPress to load our CSS file. The way we accomplish this is by creating yet another new file in our theme folder called 'functions.php'
The function.php file is quite a bit different than the other files we've created thus far. The other files can be referred to as 'template files'. However, our functions.php file is a bit more private. It could be thought of as 'behind the scenes', in the way that this file is how we actually 'talk' to WordPress. This is how we will 'tell' WordPress to use our style.css file, and any other CSS files we may add later on. So how exactly do we tell WordPress to load up our CSS file?
First, lets add the following code into our new functions.php file...
<?php
  add_action();
We notice another WordPress core function being used called add_action();. The add_action(); function is what allows us to give WordPress instructions. It takes in two arguments. The first argument is where we will tell WordPress what kind of instructions we are giving it. Depending on exactly what we want to do, WordPress will run this code at different times. In this case we want to load our CSS file, so the special WordPress 'hook' name, or what we want to 'hook' onto in order to run the funtion is wp_enqueue_scripts. (pronounced 'on queue')
<?php
  add_action('wp_enqueue_scripts', '');
Notice that we have added wp_enqueue_scripts for the first argument. What this is doing is telling WordPress that we want to load some CSS or JavaScript files. Now for the second argument...
<?php
  add_action('wp_enqueue_scripts', 'new_theme_files');
The second argument is simply the name of a function that we will be defining. The name of this second argument can be essentially whatever you want, so long as you create your new function using the same name! So, lets take a look at defining our function...
<?php

  function new_theme_files(){
    wp_enqueue_style('new_theme_main_styles', get_stylesheet_uri());
  }

  add_action('wp_enqueue_scripts', 'new_theme_files');
We notice a few new WordPress functions being used from within our defined function. First, we see that immediatley inside of the function body, we call the function wp_enqueue_style();.
wp_enqueue_style(); also takes in two parameters. The first one, in my case new_theme_main_styles, is simple a placeholder name. It refers to our main style.css file, and could be named anything you want. Now, the second argument is yet another WordPress core function called get_stylesheet_uri();. This is telling WordPress to load in our main CSS file.
If we wanted to add another stylesheet, we could simply duplicate the entire wp_enqueue_style(); function! Just make sure to change the first argument to a name that you will remember.
Now that we have our wp_enqueue_style(); function added and our file is saved, lets navigate over to style.css and make a simple change to ensure that everything is working. Lets add something simple into our stylesheet to begin with...
body{
color: red;
}
Go ahead and add the above code in your style.css file, somewhere under the theme comment. Then save your file and navigate back to your homepage and give it a refresh.
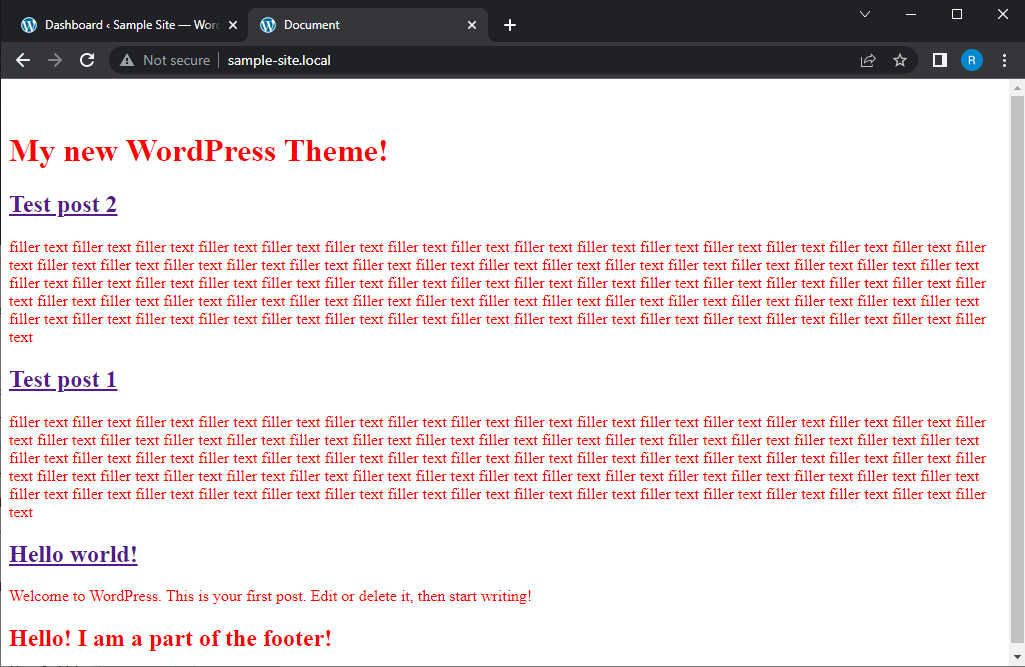
As we can see, all of the text has been chaged to red! This means that we have successfully instructed WordPress to look for and load our style.css file
You now know how to not only generate dynamic content using PHP in tandem with HTML, but now you can style the content, too! That's huge!
Now, before we move on to adding our menu bar, lets take a quick moment to review, because what we've just written out can be very confusing and a bit overwhelming if you aren't familiar with writing code. Let's take another look at the code in functions.php...
<?php

  function new_theme_files(){
    wp_enqueue_style('new_theme_main_styles', get_stylesheet_uri());
  }

add_action('wp_enqueue_scripts', 'new_theme_files');

?>
We created or defined a new function called new_theme_files. But we could have called it anything we want. Remember that when we are defining a function, we can use any name we wish. Within that function, we called the WordPress function wp_enqueue_style();, and passed in two arguments. The first argument was essentially a placeholder name that we made up. The second argument was yet another WordPress function called get_stylesheet_uri();. This is how we 'point' to the stylesheet we want to load. We COULD have specified a specific file path or directory for our stylesheet(s), but we will get to that later on. By using get_stylesheet_uri(), WordPress automatically looks for the 'style.css', which is typically our main stylesheet, and uses that. Keep in mind that when we define a function, the function must be called in order for it to run. This is what we did with the add_action(); function!
When we use the add_action(); function we passed in two arguments. The second argument is simply the name of the function that we created that we want WordPress to call at a specific moment, and the first argument is how we tell WordPress which moment that is. WordPress has many 'hooks' or moments that we can hook onto. Essentially what the add_action(); line is saying to WordPress is 'just before you output the code that will be placed within the header.php file, specifically in the wp_head(); function, let's tack onto that moment and run our custom function'. This is how our defined function is being called and our stylesheet is being placed into the head of the header.php file!
Now, maybe you're wondering why we didn't have to use parentheses in order to call our new_theme_files function. Typically, to call a function we would write it as new_theme_files();. However, the reason why we don't include the parentheses is because we don't want to call that function immediatley. Instead of us calling the function with parentheses, we are telling WordPress to call the function at the specific moment it goes to load all the information that goes into the <head> section of header.php. Remember, we are using a function in header.php that is handling our data for us called wp_head();.
Adding our WordPress Admin menu bar.
The first thing we will do is head over to our header.php file. We are going to be removing the closing </body> and </html> tags OUT of header.php and putting them INTO footer.php. For example, here is the code in header.php after removing the two closing tags...
<html lang="en">
  <head>
    <meta charset="UTF-8">
    <meta http-equiv="X-UA-Compatible" content="IE=edge">
    <meta name="viewport" content="width=device-width, initial-scale=1.0">
    <?php wp_head(); ?>
    <title>Document</title>
  </head>
  <body>
    <h1>My new WordPress Theme!</h1>
As you can see, we have removed the two closing tags at the very bottom of the file. The <h1> element is now on the final line.
To understand why we are doing this, lets take a quick look at index.php to see how our website is actually being constructed. Here is the code from index.php...
<?php
  get_header();

  while(have_posts()){
    the_post(); ?>
    <h2><a href="<?php the_permalink(); ?>"><?php the_title(); ?></a></h2>
    <?php the_content(); ?>
  <?php }

  get_footer();
?>
At the very top of the file, we see a call to the get_header(); function. This is generating our header from the header.php file. Below that we have our while loop that is looping through all of our posts and displaying them on the page. Finally we have a call to get_footer(); at the bottom that is importing the footer from footer.php. These individual files are being 'combined' in index.php and then displayed accordingly. So it makes sense to not close out the </body> and </html> tags in the header.php file, we would only want to do that at the very end of the 'overall' file being generated from ALL of our files together. We would go over to the footer.php, because that is the 'bottom' of our file, and add the closing tags there!
Lets navigate over to footer.php so we can add our closing tags, and something else as well. Here is what the updated code should look like in that file...
<h2>Hello! I am a part of the footer!</h2>

<?php wp_footer(); ?>
</body>
</html>
You've probably noticed the new WordPress function being used, just above the closing 'body' tag, called wp_footer();. If you are familiar with JavaScript and how it is typically 'linked' to an HTML file, you know that the <script> tag typically comes at the very bottom of the HTML file, just above </body>. The reason for this is because we typically want to load our JavaSctipt AFTER everything else has been loaded. WordPress can use wp_footer(); for a lot of different things, like loading JavaScript files or, in this case, adding the black admin menu bar to the top of the page.
Now, with wp_footer(); in place and our files saved, navigate back to the main page and give it a refresh. We now have our admin menu bar at the top of the page!
Now you may be wondering, when are we going to make this website look decent? Well, up next we will begin digging into the visual aspects of our theme!